Hi,
thank you very much for developing Ragdoll Dynamics. It’s a lot of fun to use!
I am testing the tool: I have successfully made a full ragdoll of my character and it behaves nicely.
However, I wanted to try a scenario in which I have a keyframe idle animation of a standing bipedal character, I wanted to simulate the character receiving a blow from an enemy, reacting to it and going back to the idle animation. As an example, the blow would hit the chest.
I would like the reaction to be simulated, but the section before and after the hit would be based on keyframes. Preferably, I would like to avoid setting a global simulation blend key for all parts at the same point in time. In an ideal world, I would prefer to see an arm simulating for longer than the chest, if the arm were the part receiving the blow.
At the moment, if I set the rotation stiffness to a value that gives me a good reaction to the blow, the character’s limbs sag before the blow itself, making it more difficult to mix animation and simulation.
At the moment, what would be the recommended way to set the simulated shapes to follow the keyframe animation 1 to 1, and then have the simulation “wake up” when it is subject to a certain amount of force, and finally go back to the idle animation? During the simulated phase I would like to use the softness values that would otherwise make the body sag during the keyframed idle.
I have tried pin constraints to keep limbs in place (and then constrained the pin constraints to the respective rig controls). However, although the pinned parts react to physical contact (e.g. another collider), the settings needed to keep them in line with the rig’s controls prevent them from delivering a good, soft reaction motion to the blow. Also, it seems that pin constraints do not react to fields.
I imagine I could get to the same result by animating rotation stiffness or the pin constraint stiffness, but it feels that might over-complicate things, the moment I have many controls to account for.
What would be the suggested approach for such a scenario?
I feel like there is something essential (and basic) I am not understanding, here.
Here at Ragdoll Corp, we love videos and pictures. Would it be possible to show us what you’ve manage to accomplish so far? It would go a long way in helping to take it further.
Hi there,
thank you for your answer. I love them too, but I did the test on protected IP and can’t share pics or videos . I’ll try it on some other asset and post again here.
Sure, the simpler the example the simpler the answer. For example, if you try and animate just a box to look the way you expect Ragdoll to help you achieve, I can hopefully put together an example of what you’re looking for.
It sounds like this is the meat of your question. Generally, it’s real easy to transition from animation → simulation. Because the simulation always starts where you want the animation to finish. From simulation → animation on the other hand is different, because you never know where the simulation might end up. Especially if you expect to tweak any of the simulation settings. And unless you know where the simulation ends up, you won’t know where to start animating from, or what pose the character should have.
In it, there are two approaches that apply to this case as well.
Roll the dice
Tilt the scale
In your case, you’ll likely best opt for tilting the scale. Namely, to establish a target position you’d like the simulation to reach and gently (or not) pull the simulation towards it. From there, you can use the Blend attribute on the solver to tackle the last 5% of difference between simulation and pose.
Throw together an example of what you’re looking for and we’ll carry on from there.
Thanks Marcus,
so, I think I managed to achieve what I wanted, using one of your scenes:
-a keyframe idle animation loop runs in the background
-a radial field simulates a blow to the character
-the solver “blend” attribute blends from keyframe, to simulation, and back
It seems to me that it works as intended. However, one of the issues I could see is that operating a global blend attribute causes the whole character to go (say) back to keyframe animation at the same time.
In the attached example, for instance, the arm, the head and the chest go back to keyframe animation at the same time, something that is noticeable to the trained eye.
This had been an issue for me in other simulation systems that require to operate a global blend attribute. Simulation has usually more detailed motion, if compared to animation, so this blend can sometimes become particularly noticeable when it happens globally on the whole character.
In this specific example, for instance, the animator would wish to have the chest settle first, followed by the head. The last thing settling down would be the hand. Operating the blend attribute prevents this. Do you recommend a way around this issue?
Conversely, if I kept the simulation “on” throughout the timeline, the rotation stiffness value needed to align the dynamic shapes to the keyframe animation would clash with the stiffness value needed to generate a soft reaction to the blow:
To solve this, I could manually animate the rotation stiffness values, by making them soft during the blow, and keying them stiff after and before the blow. However, I don’t know how practical this would become, on complex rigs.
Having said that, I still feel like I might be looking at this from the wrong angle.
Also, I understand this might just be a niche case, and maybe be one of those “I want to have the cake, and eat it, too” cases.
However, in this case I thought it would have been great to have the dynamic limbs follow the rig one to one until they are awaken by the simulation, and then have them be attracted back to the keyframe pose, as opposed to going back to the pose their rotation stiffness would require them, to. In the top example, for instance, the head sags when I give it the rotation stiffness value I need to get a good reaction to the blow, so I would rather desire to have the head attracted by the animation, wake up and simulate with the desired softness, and then have it attracted back to the animated pose.
Also, I must confess that in my wildest dreams I wished for a fall off object to control the solver blend (like in MASH).
This is not a feature request (I can’t even imagine the amount of problems such a feature could raise), but rather a fantasy of mine.
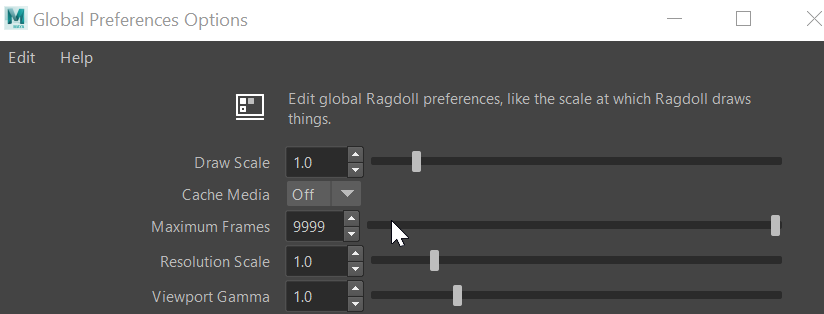
Also, I am trying to reproduce the same behaviour on the original asset I started with, which is a lot taller, and I am running into an issue which I believe is connected to the scale of the character.
In the actual scene I’d like to test (the one I can’t share ), Maya units are set to cm, and the character is about 180cm tall.
If I set the root’s “Translate Motion” to “Soft”, and the “translate stiffness” to “10000” (which I believe is probably exceedingly high). The root still moves away from its controller:
Even setting translate motion to “locked” does not appear to produce an effect. The root still falls to the ground (I’ve set the feet to “simulated”, for this second example).
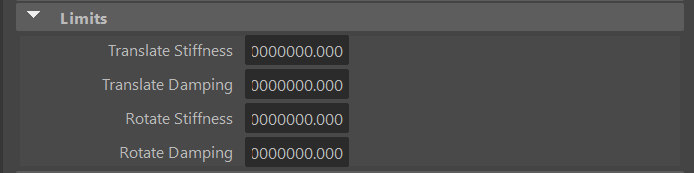
Translation and rotation stiffness limits are set to:
10000000000.000
Damping limits are also set to (now I can’t remember why/if I really needed to set the damping this way):
10000000000.000
(which might sound crazy high, but made the rotation limits work nicely).
I scaled up the limits because of what I read in this post.
For reference, the manikin scene has:
rSolver scene scale is set to 0.1
t/r stiffness limits set to 1000000.000
damping limits set to 10000.000
And the manikin is about 18 units tall (units are cm).
I suspect the translation stiffness limit and damping play a role in the root moving away from its controller, but I was unable to figure a solution out, yet.
Fantastic summary, thanks for putting this together! I’ll return the favour in just a moment, but for scene scale, try the new Scene Scale gizmo in the Manipulator and make sure to adjust the gizmo to fit your character.
Thanks, I discovered the autoscale feature right after setting up my shapes and scaling up the solver (I am so used to scaling up the solver, that I automatically went for it). I’ll try it.
By the way, in the meantime I tried scaling up the manikin scene and it behaves consistently (the root does not fall away from the controller), so I think my root issue on the actual asset must be due to something I did during set up. I’ll look into it on my side.
Thanks for your help so far!
Root is set to
translate motion: soft
translate stiffness: 1000
And it still goes its own way away from the controller.
At this stage, the one thing which I am sure is different from manikin, apart from the limits, is that in this particular rig, the hip joint and the first spine joint are in the same exact position.
The respective controllers also have the same pivots. I placed the colliders in different places, but I wonder if this could throw RD into some confusion.
Still awaiting a moment to dive deeper into this, but one thing that caught my eye is the very high damping.
When you want to get closer to a given pose, you’ll want to reduce damping, not increase it. Damping are like airbrakes, they stop motion. Be it translation or rotation. Also damping is a ratio, rather than a final value. Typical “strong” values are 0.1 and 0.01. With that, the final value will be 10x or 100x less than stiffness.
Also, give 2023.10.06 a whirl if you interact with the stiffness of the root marker, a few things were tweaked there.
Ok, having a look at this now, and will divide the task into two parts.
Transitioning into simulation
Transitioning into animation
Transition into Simulation
The Blend attribute is capable of interpolating between any animated and simulated pose, but it does not take into account mass or momentum and is meant to solve only the smallest of differences between two poses.
In this case, you seem to have a character with a permanent blend up until the point of being hit.
Here I’ve exaggerated the downside to this approach, which is that you can’t be certain that the simulated pose matches your animation since you are simulating into a pose. In my case, my character has slightly dropped with gravity, so as soon as I blend into simulation, the character drops. This has to happen before box hits him, such that the blend can be smooth rather than instant.
A better option is to have your group set to Animated and transition into Simulated.
Benefits include:
No need to blend anything
You don’t need to pin or otherwise constrain your character leading up to the transition
You don’t need to simulate any frames leading up to the transition, you can set the start frame around the time of the transition; saving on performance and tweaking
Most importantly, the pose at the transition will always 100% match your animation.
Transition Into Animation
Generally, you’ve got the right idea. But the Blend attribute can only get you so far. For the best results, I recommend:
Animating the group stiffness/damping
Animating individual marker stiffness/damping
Finally, tune the final pose with pin constraint stiffness/damping
Here’s an example of this, where the transitions are staggered, torso moving first, then head, then arms. I’ve selected all animated Markers here so you can see what the animation looks like.
Above is just the head animation.
There are 3 pin constraints in the scene too; they are there to help get the final pose closer to the animated pose, when tuning markers isn’t enough. When disabled, you can see there is a slight gap between the simulation and animation once I blend it back.
This can happen if the hierarchy is deep and gravity has too much of an effect on the overall character. The pin constraint add an additional worldspace force onto the Markers to get them closer to that final position. An alternative is animating away gravity, to remove any of those counteracting forces.
Here you can see the pin constraints (with staggered animation) getting markers into position before performing the blend.
And viola, the final result. With a high enough stiffness, and low enough damping, any simulation can reach the animated pose; pin constraints help, disabling gravity helps, and finally blending is a last resort for vertex-perfect final positioning.
Past this point, you can always tune the layer that keyframes are recorded onto.
The transition into physics, yes, the Kinematic → Animated approach is better. But transitioning back into animation is not niche nor unusual; it’s just a very hard problem to solve. We are working on alternative solutions to this, from a very different angle, that I expect will solve this in a much more artistically friendly way. We’ve been at it for a solid year or two, as it will solve not just this problem but many more, and it’s getting close; at most another year. But yes, a hard problem! This current method is as easy as I expect we can get without introducing new technology.
Yes.
Naaaaah haha. That’s cheating. That’s what games do, because they too struggle to solve this problem proper. As an animator with an eye on every frame and control over each limb, the aforementioned approach should yield much better results. Blending is a hack and last resort, with no respect for the real world or realistic results, and it should be treated as such.
Hope it helps, and please do post more questions, especially in this form. This was wonderful!