Dragon and Me

Hello wonderful people!

My name is Alexey, I am an artist, a new person here on the forum and a completely new person in the animation field.

I saw the RagDoll presentation on youtube completely by accident, around a year ago, and I was absolutely blown away by the dynamics this tool gives to the models. It’s like it lets them be free…

That time I said to myself - I want to create a dragon, learn Maya and animate it in RagDoll.

While I have certain experience in modeling I am zero in animation. Someone who has just very basic idea of how it works.

So it took me 7 months to create this Draguan model. I used my beloved iguana pet as a reference. Was working on weekends and after work hours.

Now this is where I need your help and any suggestions from PROs like yourself will be greatly appreciated!
I learned the basics of Maya. Here is my first eye animation. What should I do next?

My understanding is - to start using RagDoll, the model has to have a rig, right?

I am trying to find a tutorial on how to rig a dragon but nothing seems to be good. Or I am looking at the wrong things. I am sooo much noob in it. Should I use an AdvancedSkeleton plugin? Should I use other things? Million other questions.

Any suggestions of dragon rig courses? I found one from Sophoria Academy. But it’s $1k. A bit too much for me.

Yes i am noob, but I can be very dedicated in learning.
Will greatly appreciate your time and suggestions!

What a lovely introduction, welcome aboard @RID :partying_face:

It may not look it, but it is my personal goal with Ragdoll to introduce artists such as yourself to the world of character animation. Today, it’s a tool primarily for experienced animators and the workflow shows that (it’s a bit technical). But within the next few months, this will change significantly.

That said, the good news for you right now is that you do not need a traditional rig to get started, you only need joints. Joints determine how many body parts your dragon has and around which point they rotate. For a model with significant surface detail, your main obstacle will be associating vertices to these joints (called skinning) for a smooth interpolation between them. But for the purposes of Ragdoll, even skinning can be entirely ignored.

I would recommend these two resources, both tackling setting up and animating with Ragdoll from just a model.

The Wasp is simpler, so I’d start there. It uses only basic Ragdoll shapes, whereas the dog uses the full geometry which I would recommend as a solid next step.

With that, you’ll be able to get your dragon moving and falling to the floor and perform basic animations like flapping of its wings, with full secondary motion out through limbs and tail etc.

If you post your progress here, we’ll be here to help you along. Good luck!

1 Like

Good day Markus,
Thanks so much for the warm welcoming and response! Pleasure to meet you!
I was going to write you on LinkedIn a while ago, but then thought this guy is a founder, he will not answer me, haha)))

I watched both tutorials! Looks impressive what this thing can do.
For me, as a newbie, the process still looks very complex, even the wasp one.

Also the speed of the video is higher and I am unable to follow your step-by-step actions even though I understand the context of what you do and tell behind that, as a core idea.

Any chance, in future, you plan to do the video tutorial for beginners with steps? I think it’s not only me who is interested in diving deep but meets this entry level barrier.

Regarding the dragon animation, I plan to do a shortfilm later the road, that will include all kinds of actions of an animal, not just simple moves.

And would better spend more time in proper rig setup right now than be limited once the animation production happens.

So I feel like I need to do some rigging course first, do the proper rigging and skinning and then jump on RagDoll? As I saw in this video

What do you think?

Thank you!

Hah, founders are people too. :blush:

For the body mechanics, I would say don’t bother. Just about every example you’ve seen with Ragdoll so far - including those by Jason Snyman - are made with just a plain joint hierarchy. Occasionally we put NURBS curves on them to make it look nicer, but at the end of the day all you need is limbs you can rotate.

This will become more true as Ragdoll develops and is able to take on more of the traditional animation pipeline.

Where traditional rigging is still relevant, especially in your case since your model has a lot of surface detail, is deformation. For that, I would look into skinning tutorials and possibly various muscle solutions like Maya Muscle, Houdini’s Muscle, or Ziva Dynamics. You can get a long way with Ragdoll for muscles too, but as soon as wrinkles and volume preservation becomes relevant you’ll need additional tools.

1 Like

Awesome, thanks so much for answer, Marcus!

Q on license: which one should I buy? Personal Is enough for 1 non-commercial project?
I see it has limitations. How critical is it?
Record up to 100 frames*
Export up to 10 Markers*

My overall goal is to have maximum efficiency while working. Should I do Freelancer?

Dragon workflow –
Maya Muscle is a famous one, even me heard of it.
So it will be used to skin and weight the membranes of the wings mainly right?

There’s a dragon example included in the asset library for Ragdoll, click the item at the bottom of the Ragdoll menu and boot it up to see how far you can get. It’s the dragon from our landing page (at the time of this writing).

Freelancer for sure, Personal will be limiting both in terms of performance and features.

Not because it is any good, but because it is oooold :sweat_smile: Made in 2004, acquired by Autodesk but barely changed or updated.

In any muscle solution, you use it to represent the physical muscles of a character. Each muscle would be attached to two bones, much like a real muscle, and move slightly different from the bone itself, providing some additional volume and in most cases “jiggle”; which is just some vibration to enhance the feeling of weight during motion.

The Ragdoll Muscle example (linked above) captures the essentials; a single transform to capture volume and jiggle. Then you have Houdini and Ziva which takes it to the next level and not only jiggle but simulates the muscle itself to preserve volume and surface tension, producing wrinkles and other juicy bits.

1 Like

Hi Marcus, thank you for your time and answers!
Just bought a license. Excited about the journey ahead!

I started with a rig, here is some progress. Comments are very welcome!


I also have a question on the wing, if you can suggest me what to do. I was not able to find info on youtube.
How to be with the wing and membrane areas? Do I need to make an additional joints for them? Or it’s a skinning thing mainly and I can move forward with current bone setup?

Thanks so much for help!

Great work, thanks for sharing the progress!

Looks solid, the true test is applying some default skinning and rotating the joints to see whether (1) skinning holds up and (2) rotation axes feel natural. For example, you should expect that when you rotate the knee, that double-knee you’ve got and foot that the same axis, e.g. Z in your case, should fold them nice together nicely. It will make it easier to both animate and tune Ragdoll’s limits.

I would avoid the temptation to assign markers to each knuckle, and instead assign one to just the foot joint and then replace the mesh with the entire foot mesh, toes included. The dog example above is a good way to split up the mesh. That way, you’ll get one big block for the foot, as opposed to each toe separately. That will get you started without overcomplicating things, and then later if you find yourself needing toe motion and contacts, I would go in and add them. But your primary challenge will/should be the overall body first. Each foot is generally as complex as the entire body, both to animate and to setup. So delay it as long as you can.

For wings, there are a few ways to go about it. I would recommend you start with this approach, which keeps the wings together by distance constraining their tips together.

For the most realistic approach, we’ve found that you’ve got in the “batty” and “wyvern” examples of the Ragdoll asset browser to be the most solid.

That’s if you want the wing deformation to participate in the simulation, to get turbulence and secondary motion to come along, and generally behaves the best.

1 Like

Hello Marcus, thanks so much for all info! And for spending your time.
It’s so much valuable for me now, every piece helps understand the general rigging concept better while I’m learning it.

With my rigging approach I tried to simulate Dragon’s real axis of rotation of the joints. Here’s my reference.

If you see where it can be improved or done differently, please tell me. Because I work according to my own understanding, that is not always correct.

Thank you! I will learn the thread you sent above carefully. My question on this is when I’ll need the dragon to fold down the wings (sitting position) will this be the correct bone structure approach?
viserion-baby-dragon-1-e175349

I understand what you’re saying. Start from simple shapes and get into details later.
The thing is I am also trying to plan for future, let’s say I want to put the dragon into the pose like this (landing animation) I will need those joints to be able to pose it this way, right?

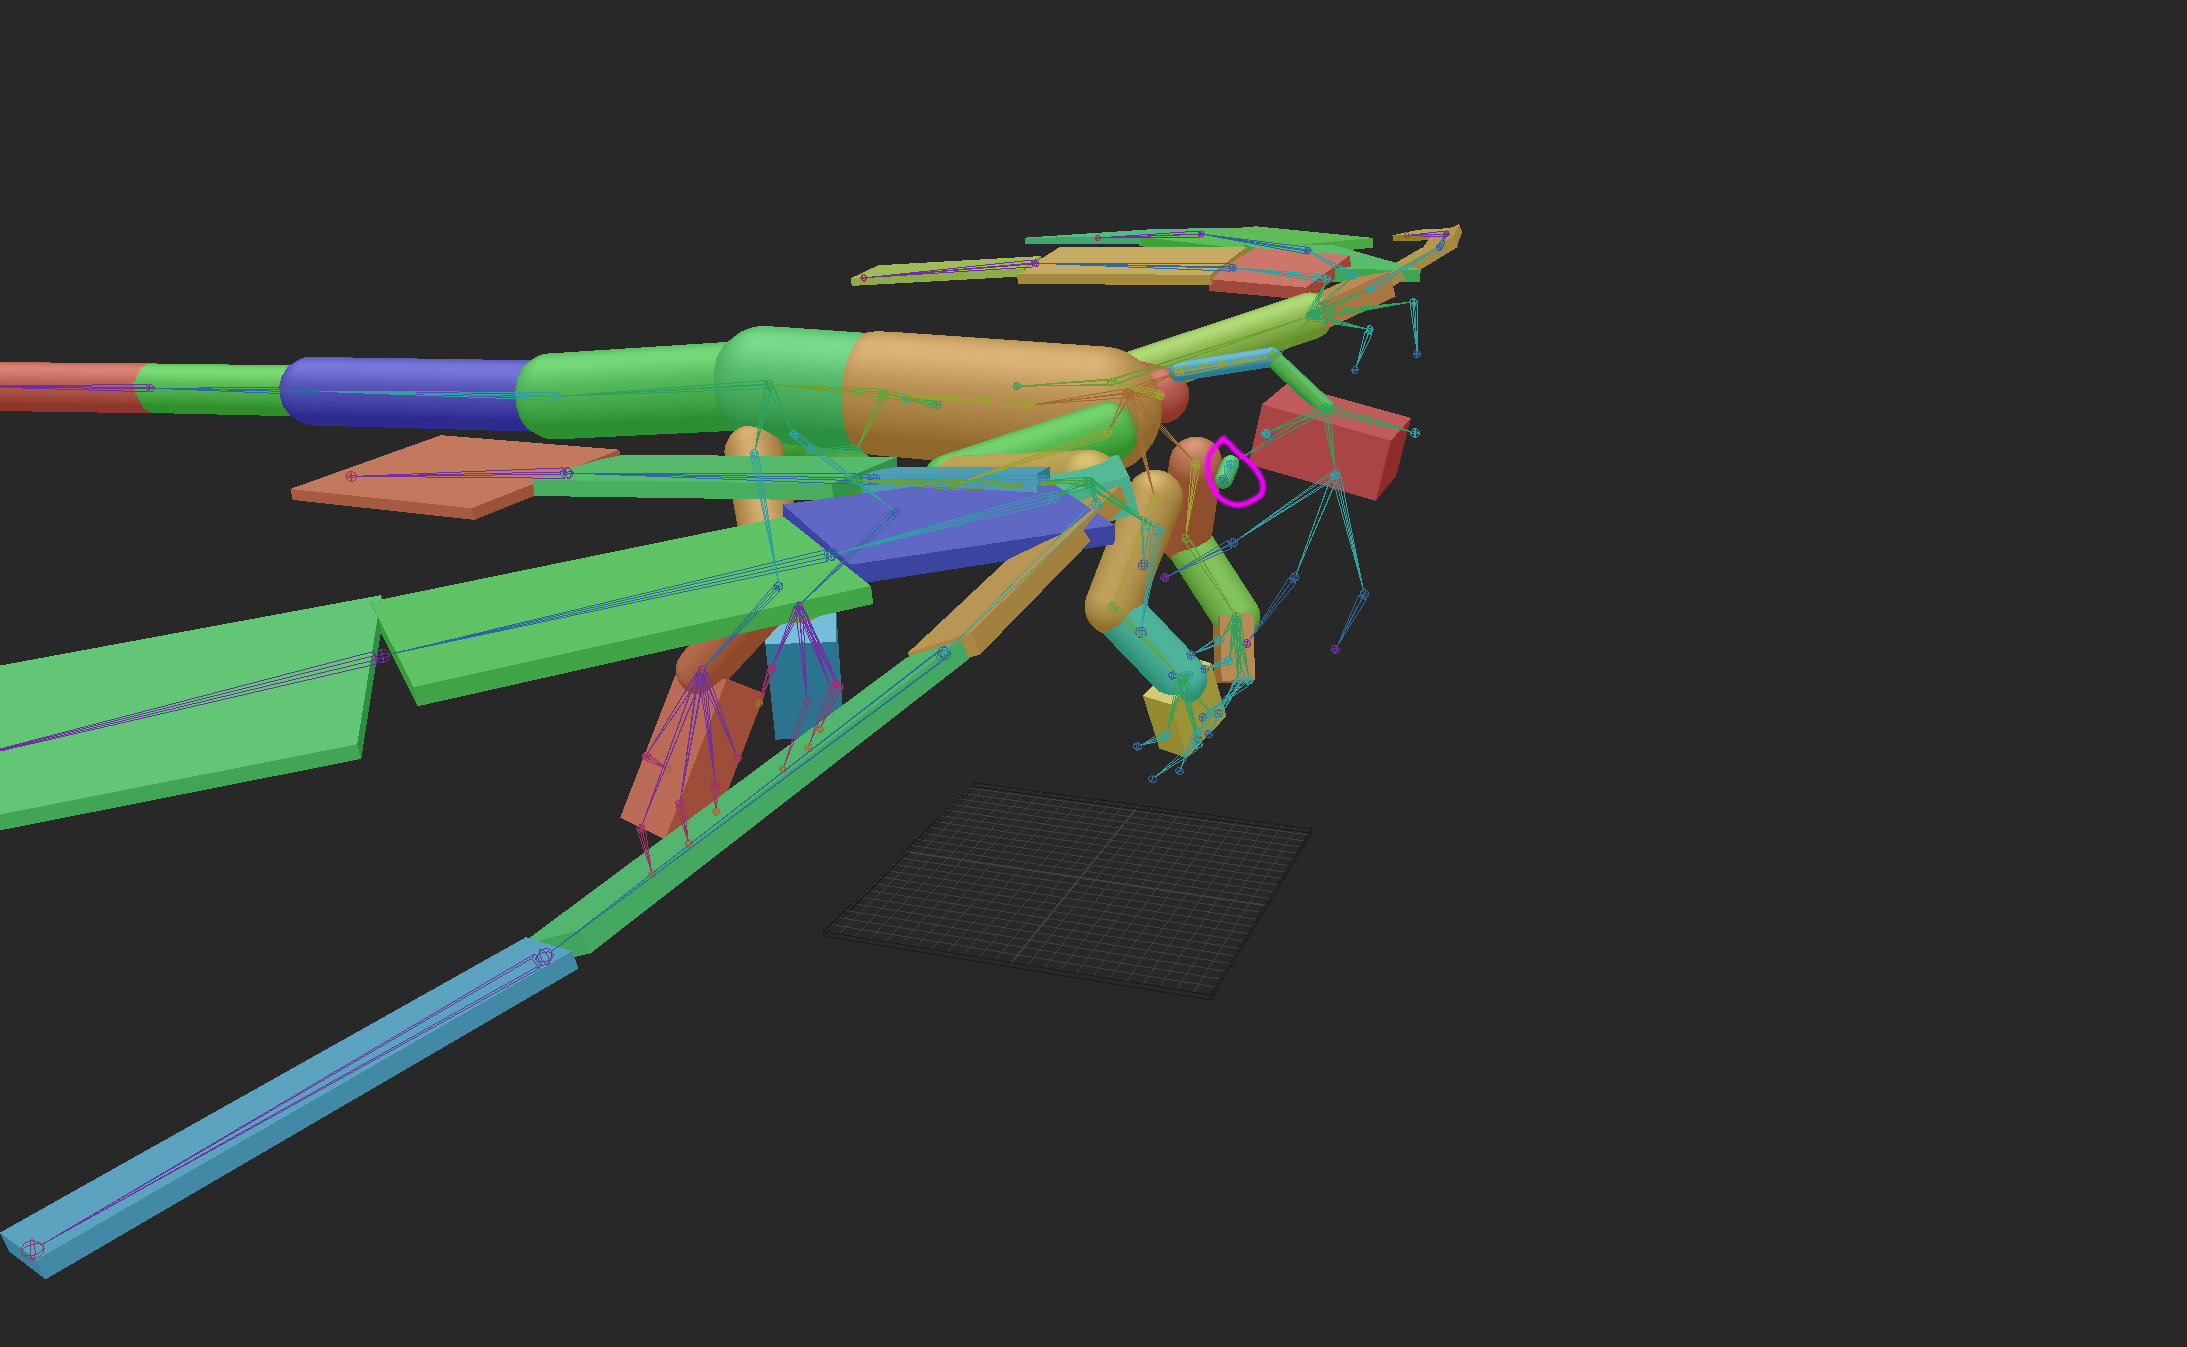
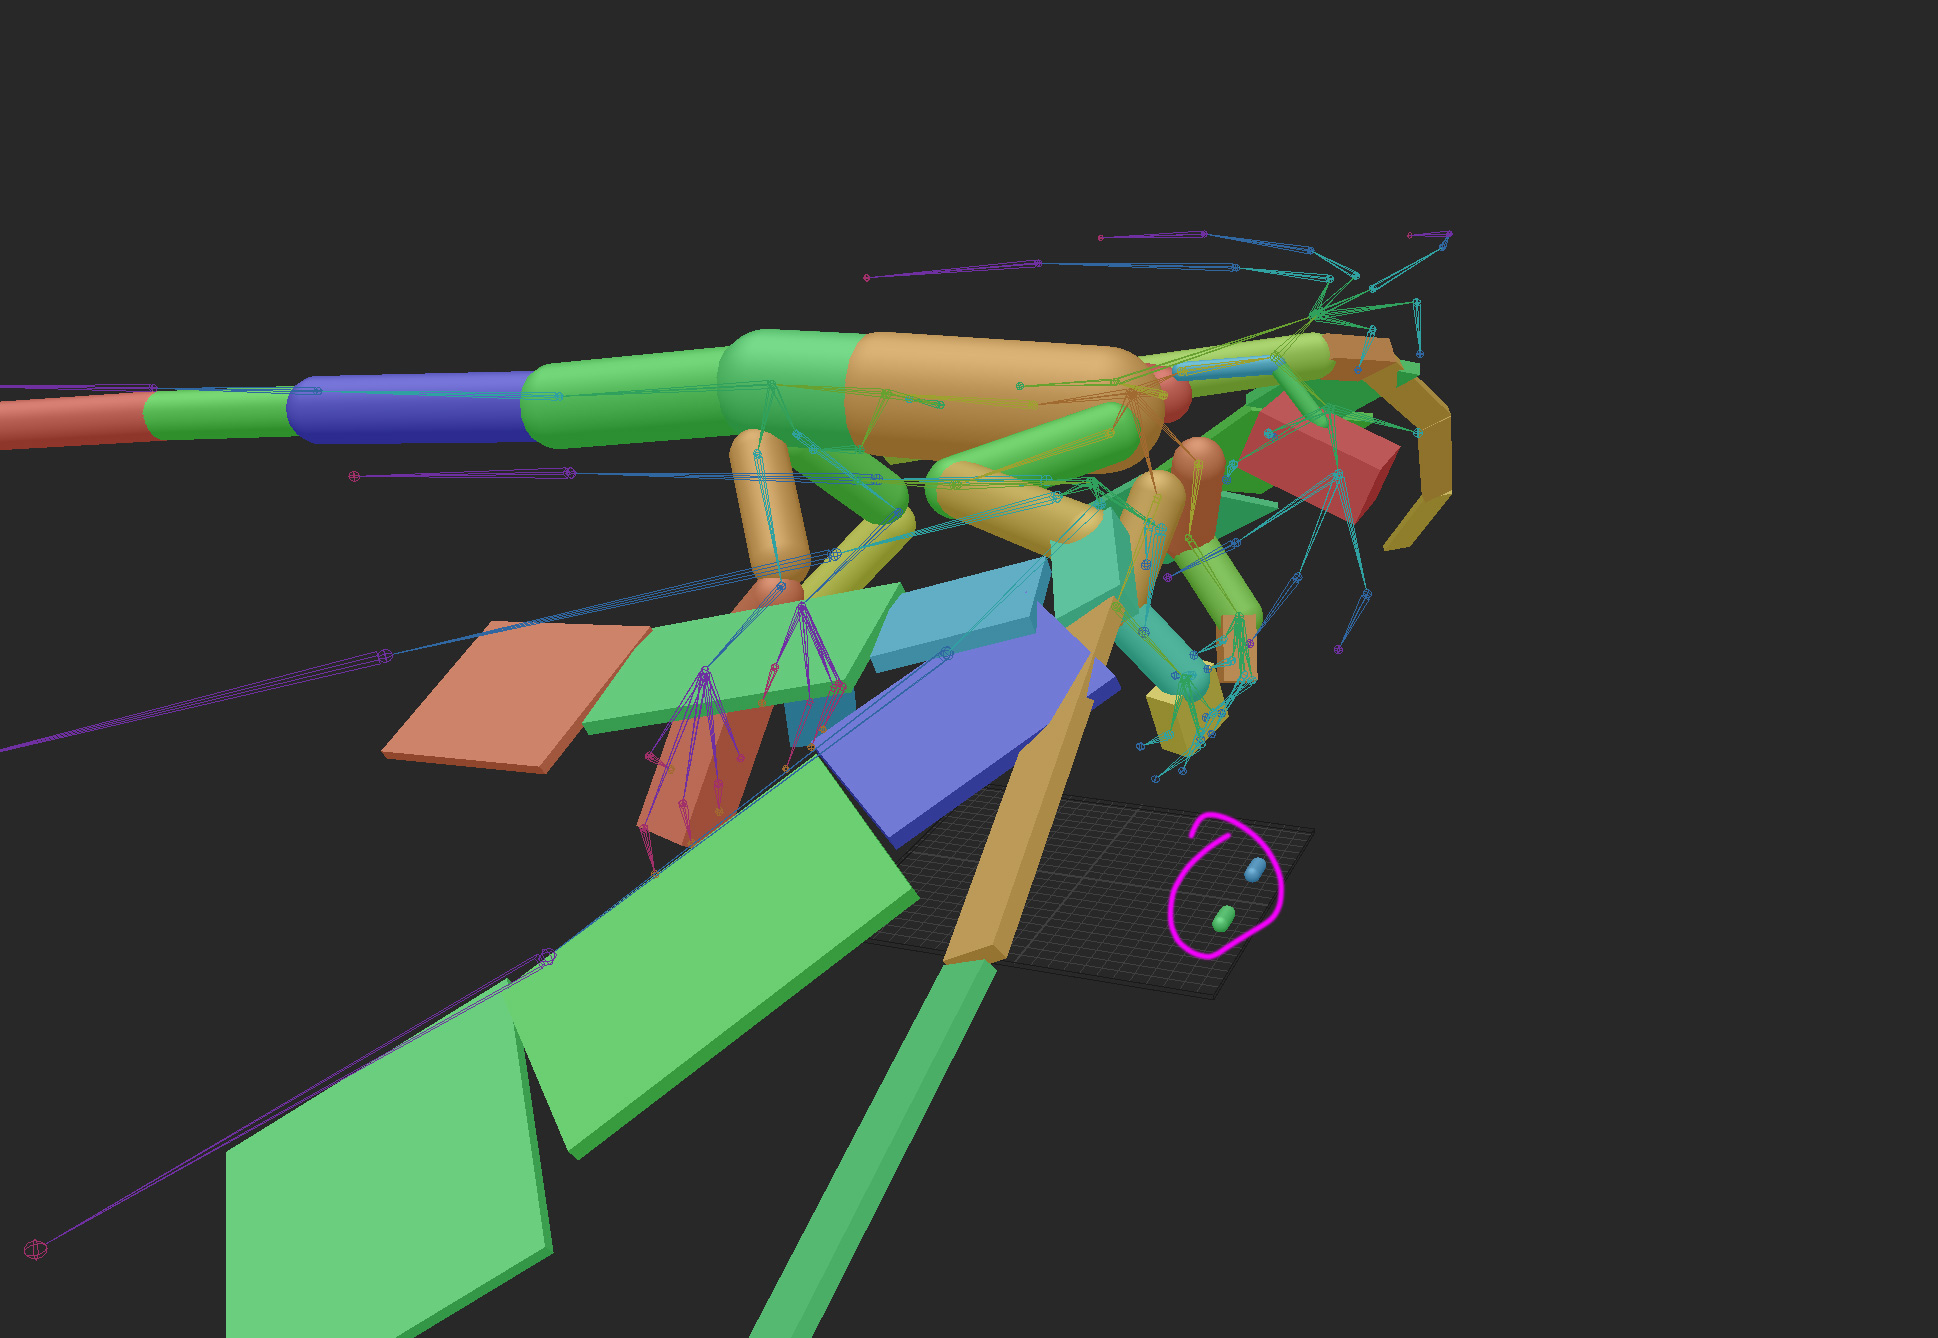
I’d say looking at real life is a good start, and I wouldn’t bother trying to think ahead until you’ve been there, done that. Expect to draw these joints, assign physics to them, and play around with the result at least 3-5 times before committing to anything. It needn’t take longer than an hour the first time, two hours next time and so on. Each time, you’ll get a greater and greater understanding of the process and better able to think ahead each time.

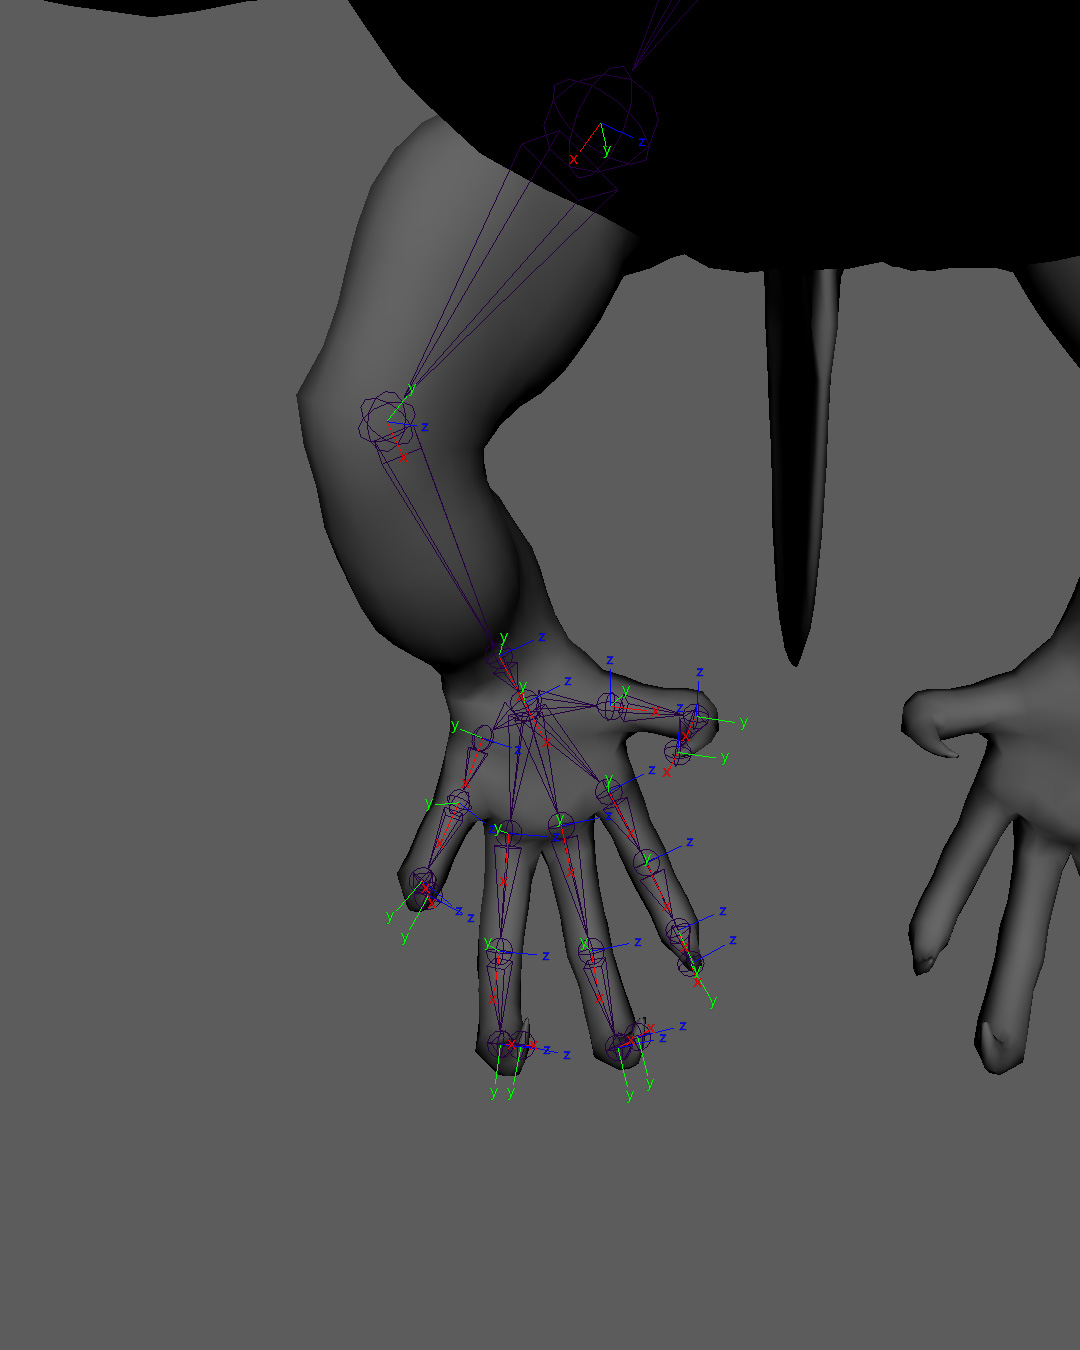
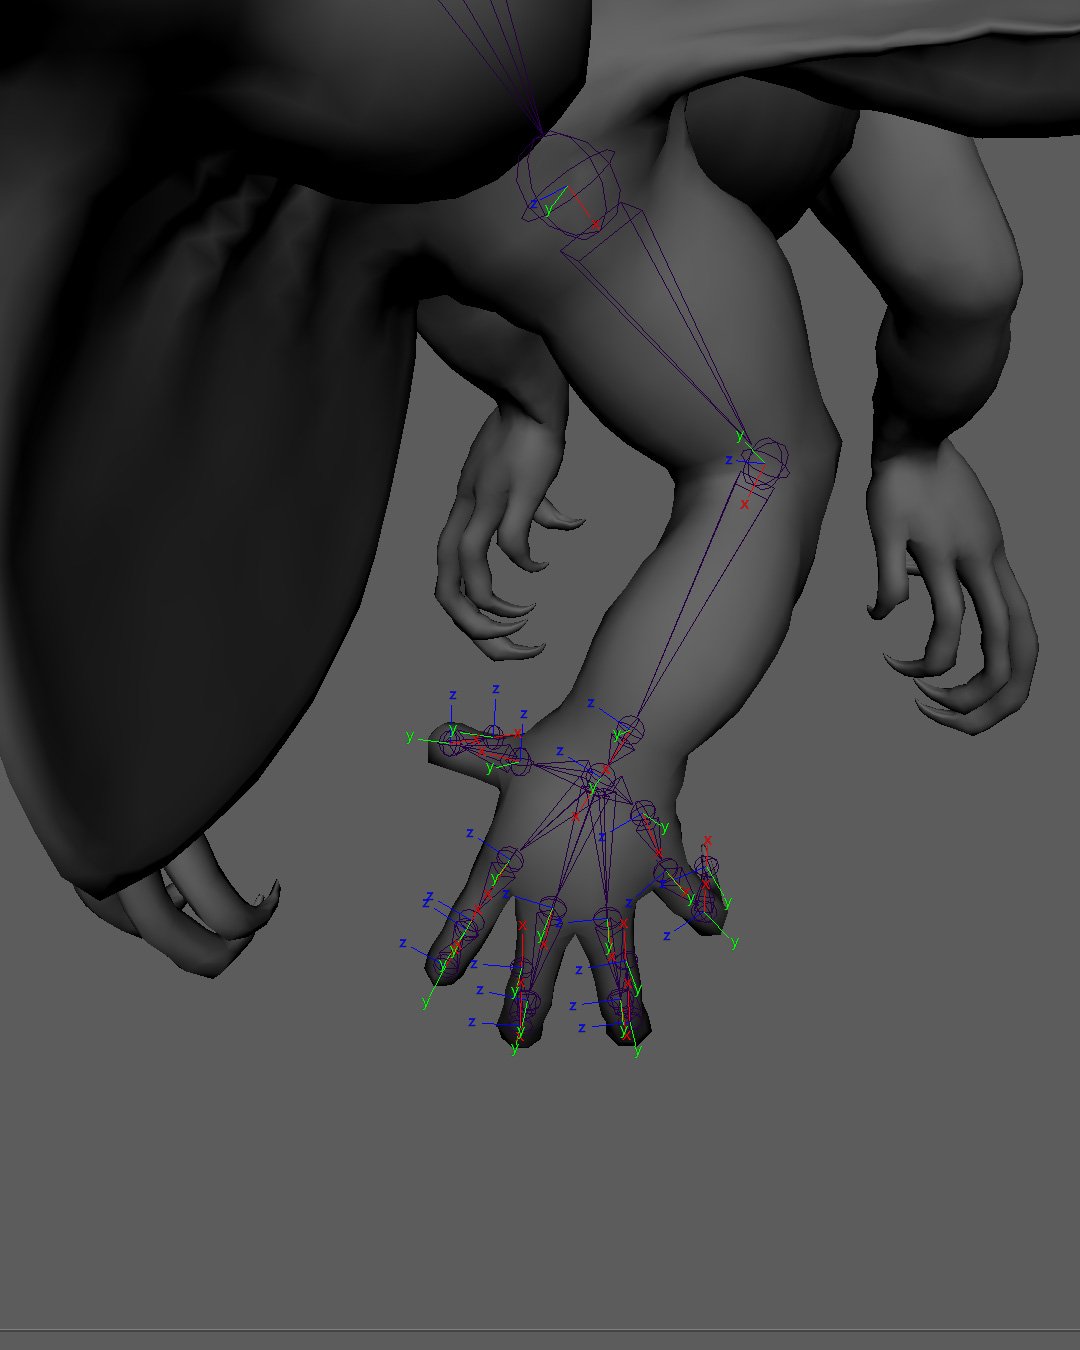
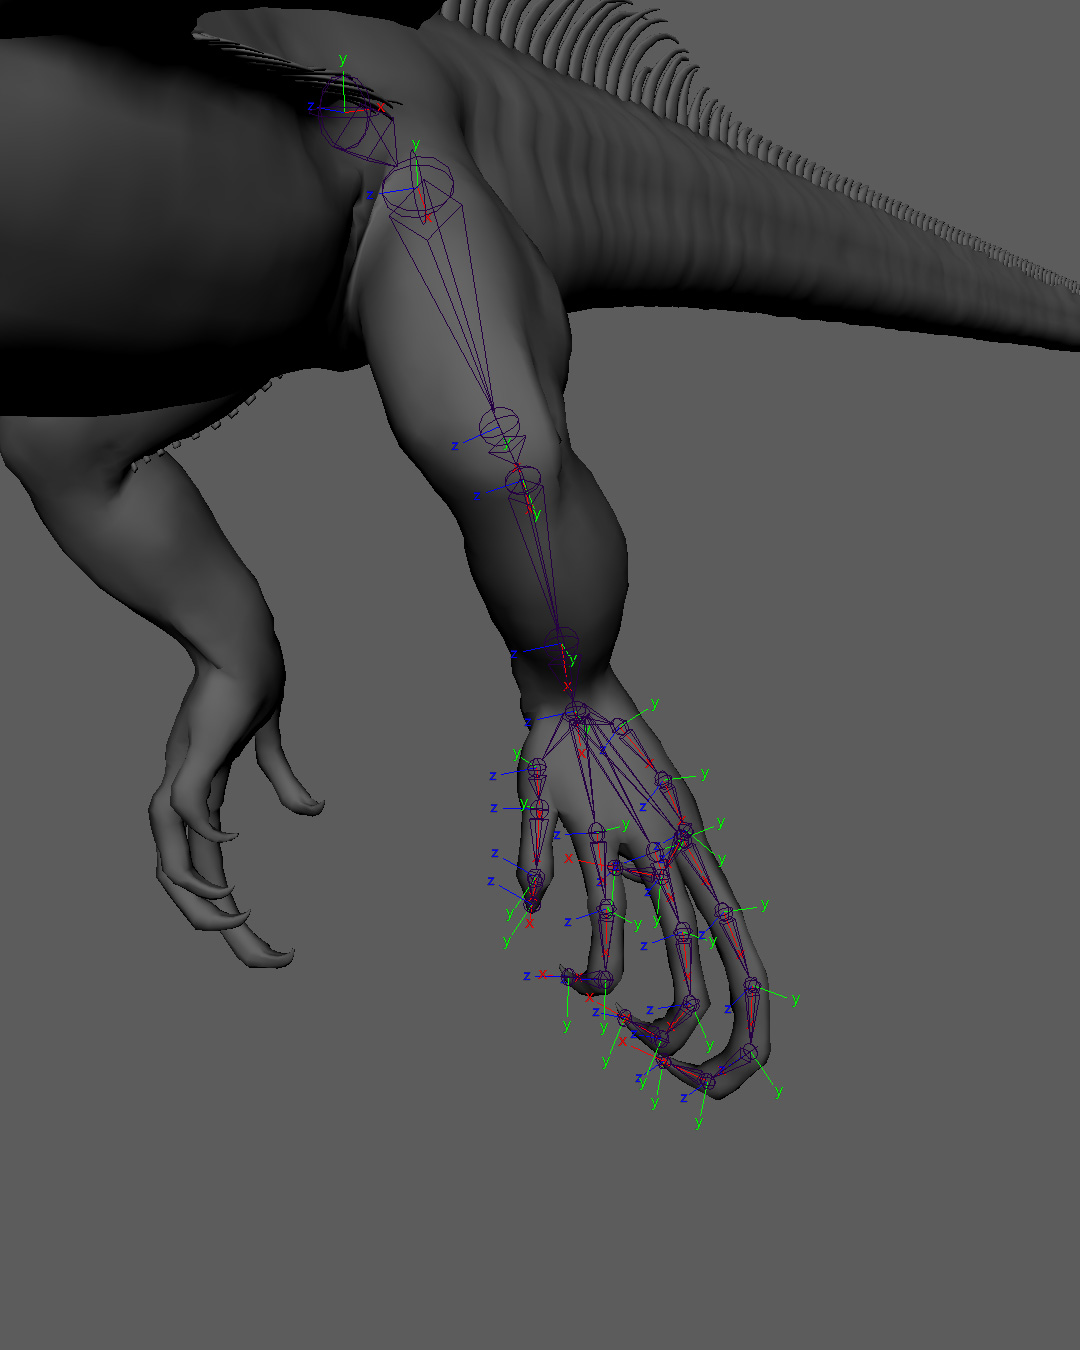
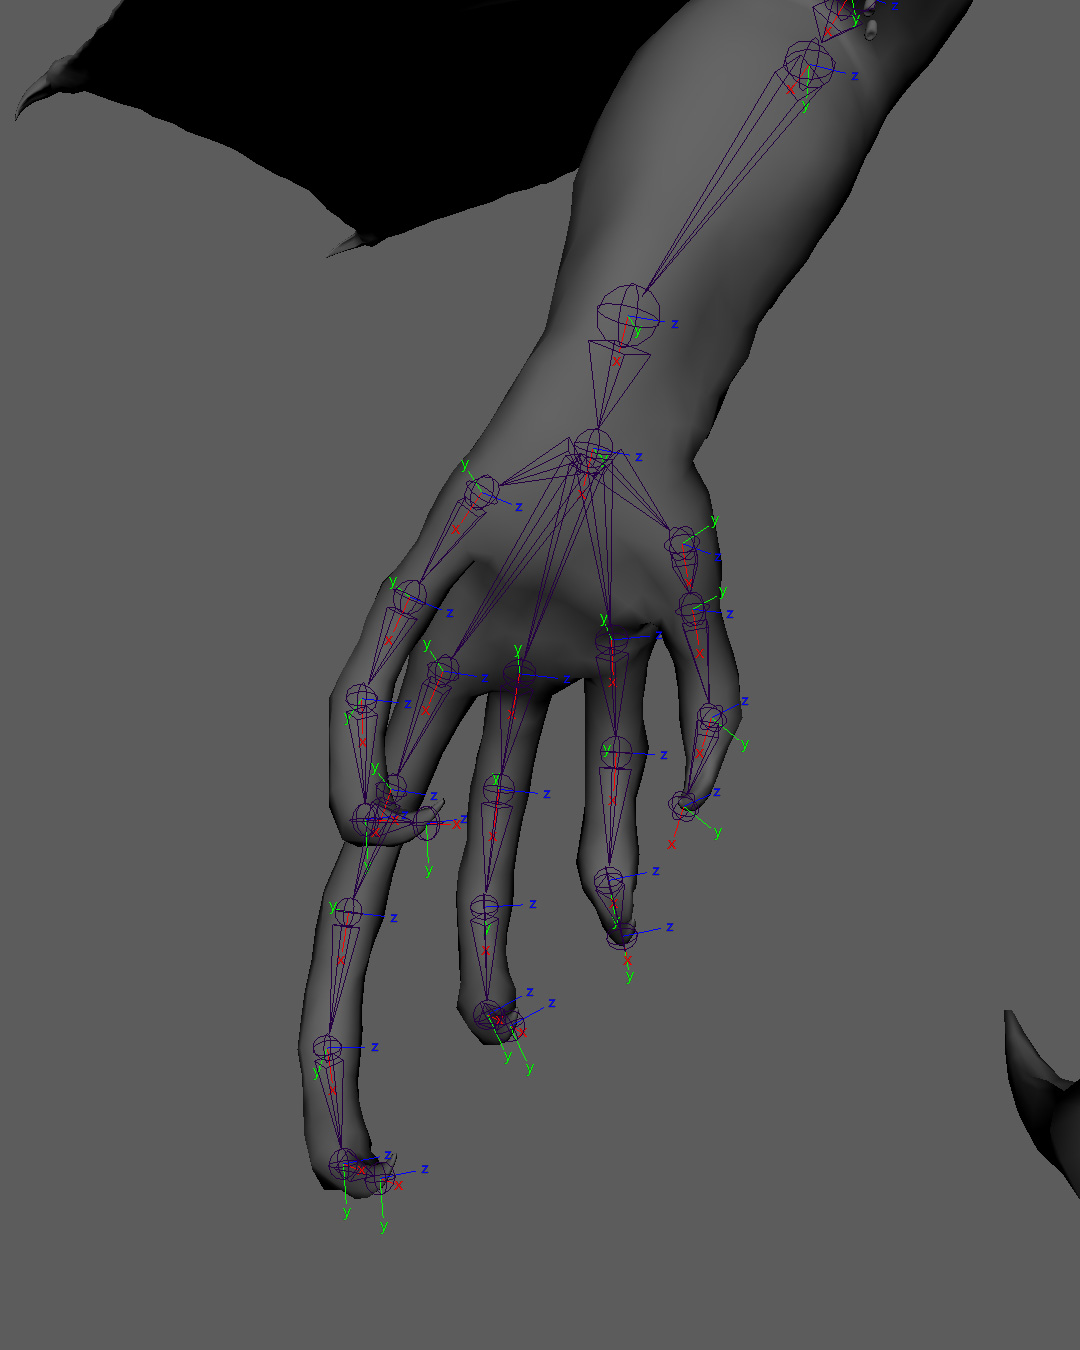
For starters, what I expect you’ll find is that there are ways to model you character that make setting up these joints and axes easier, primarily related to IK, but not because you need IK everywhere, but because IK is the most sensitive to clean and consistent axes and is a good litmus test for what makes a good rig good.

Primarily, to have limbs be (1) planar and (2) convex.

Feature Description Why?
1. Planar For limbs to lie flat against a plane To avoid the need to counter-animate
2. Convex For limbs to have a slight bend; avoid straight lines, e.g. a fully-extended knee To better facilitate IK
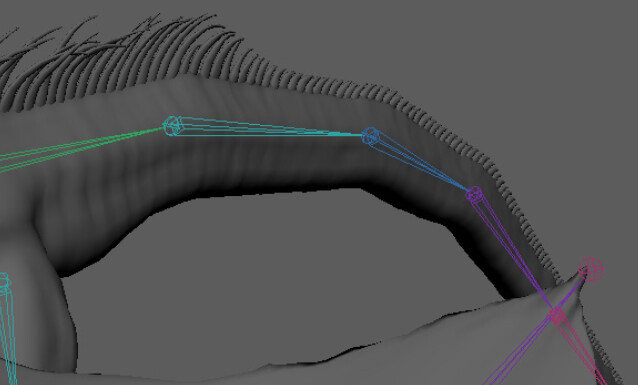
Planar Limbs

The above is an example of a typical model where a limb, in this case the toe, is non-planar. The resulting joints can’t be folded in on themselves without also animating a second and (sometimes third) axis.

Your best bet is to model each limb along a plane, and apply the curvature using your controls/joints instead.

There are tons of ways to get your joints fitted along this plane, here’s one of them.

Convex Limbs

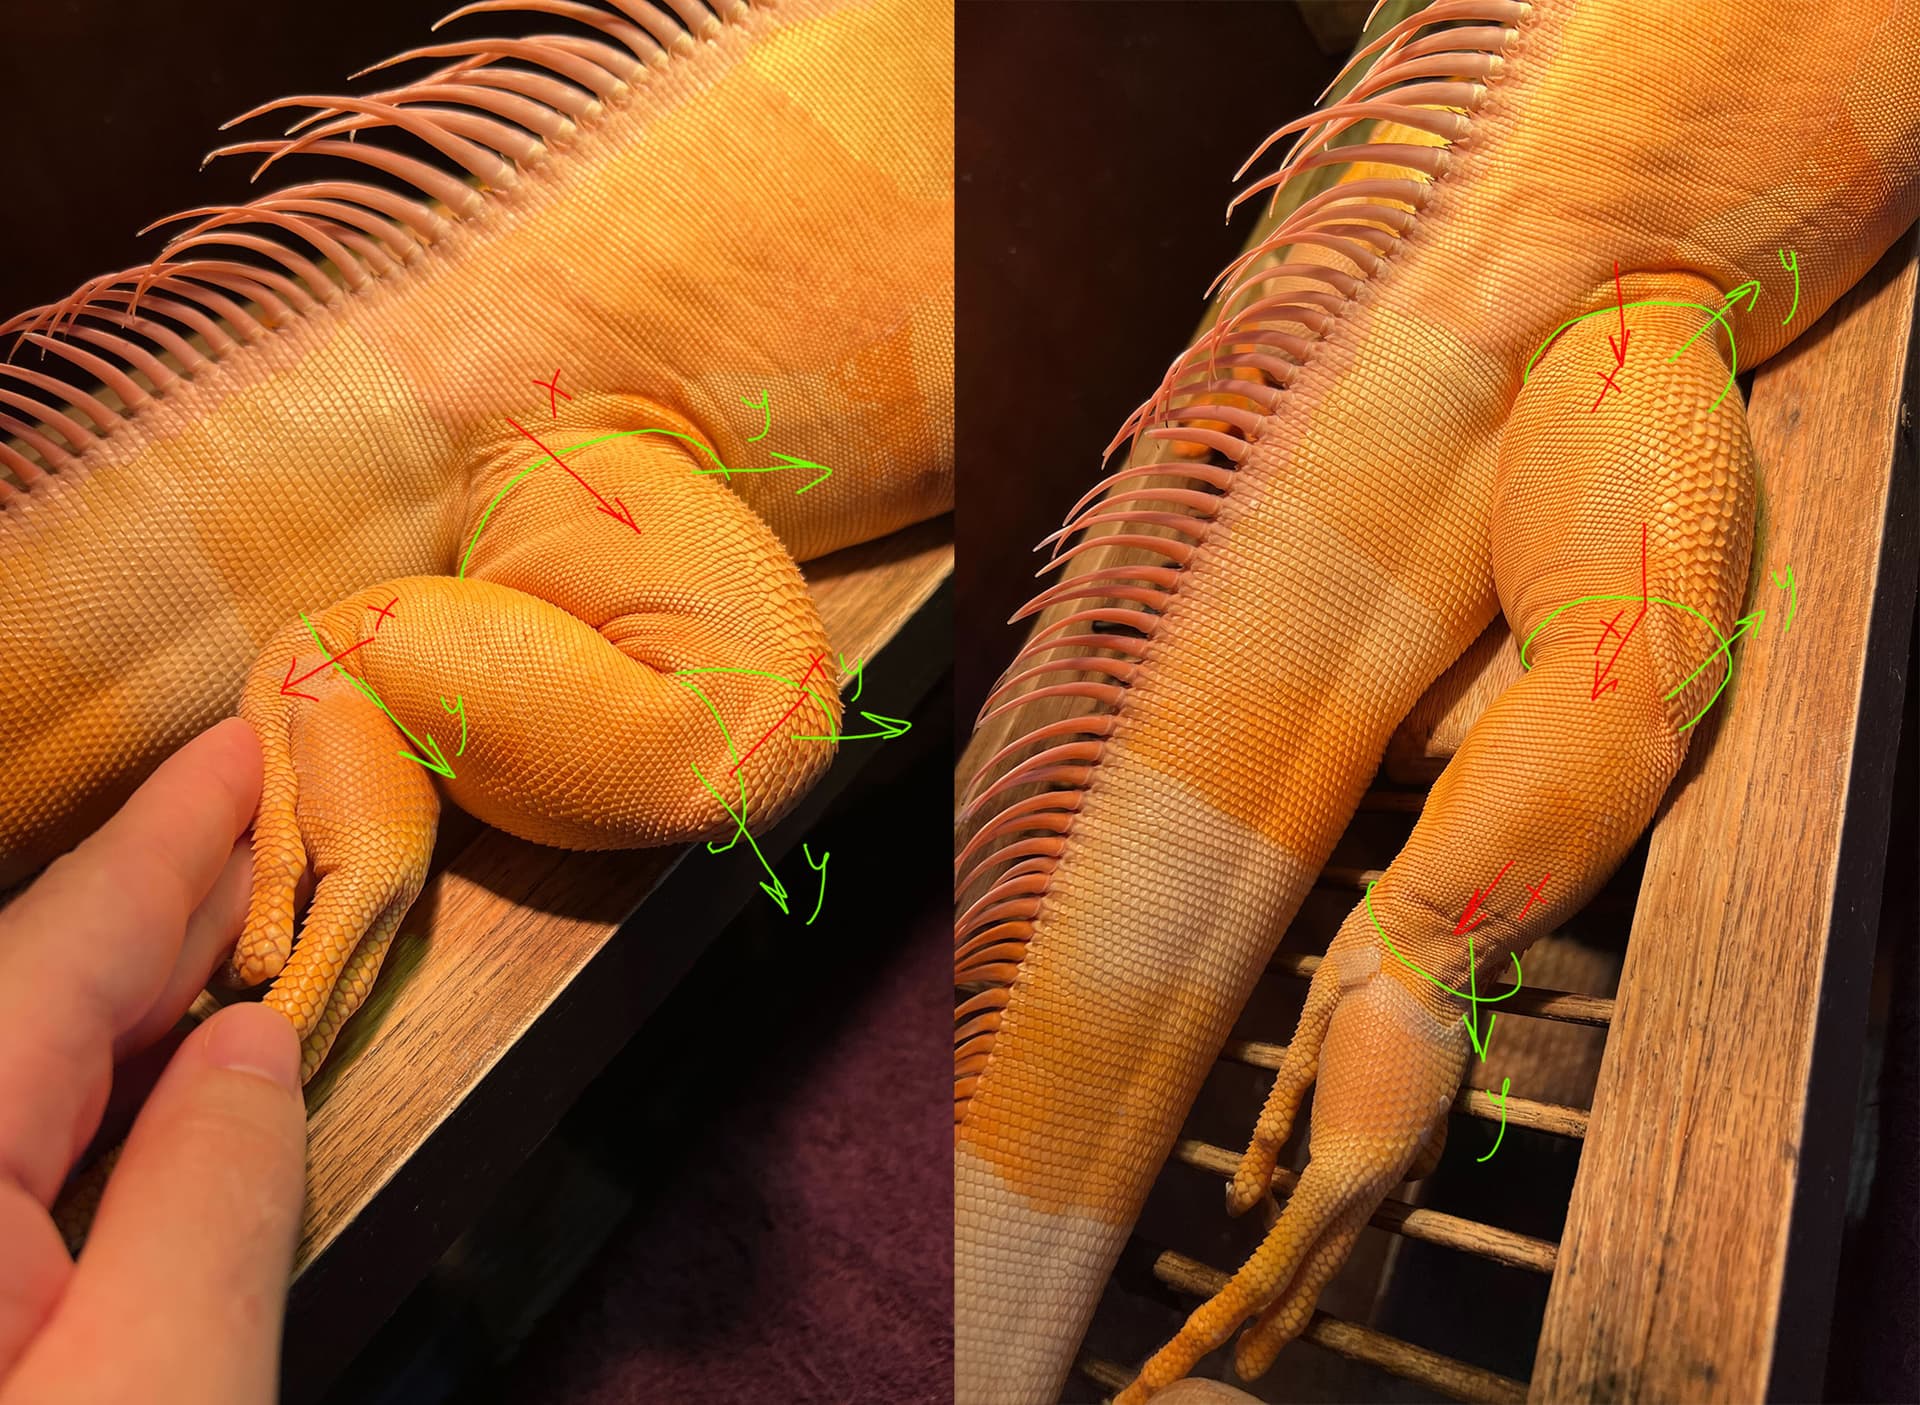
The next thing to look out for is when your limbs either have no curvature, multiple curvatures, or curvature in a direction it isn’t supposed to continue bending in.

The human knee is a good example, because we can bend our knees slightly backwards, and do so most of the time in a natural stance pose. This is the worst possible pose to rig, because once you assign IK it will assume you intend to continue bend in the direction a limb is already bending - backwards.

Here’s another example, where the knee is bent slightly outwards, also perfectly natural and anatomical, but notice how IK will assume you want it to continue bending outward.

You’d think that the “pole vector” constraint is a remedy for this, but there are 2 reasons it is not.

  1. It applies unnecessary rotation to the limb to “fix” the bad direction
  2. An underlying issue is that our joints are not planar, see above for why that’s important

So in your model, your best bet is to introduce that slight bend in the direction you expect a limb to continue bending.

But we’re not quite done yet. You’ll notice that although we do get slightly closer to bending in the right direction, notice how the foot is spinning out of control?

Let’s bring out our trusty plane.

But alas, we’re still not done yet, because even though we’ve modeled our joints along a perfect plane, Maya per default will assume that your global Y axis is facing in the direction of the knee, which is not true.

So we’ll bring out the old Orient Joints dialog and fiddle with the settings.

And there you have it; everything moving along a flat plane. This is how you want each of your limbs to behave.

Summary

As you can see, your model is still anatomically correct, but also technically possible to rig. This isn’t unique to Maya, but to animation in general. Real animals and humans all have a slight bend to every limb, so your model will have to end up in a less natural pose if is to survive the rigging process. It’s during animation that you bring back that naturalness and retain control over your poses.

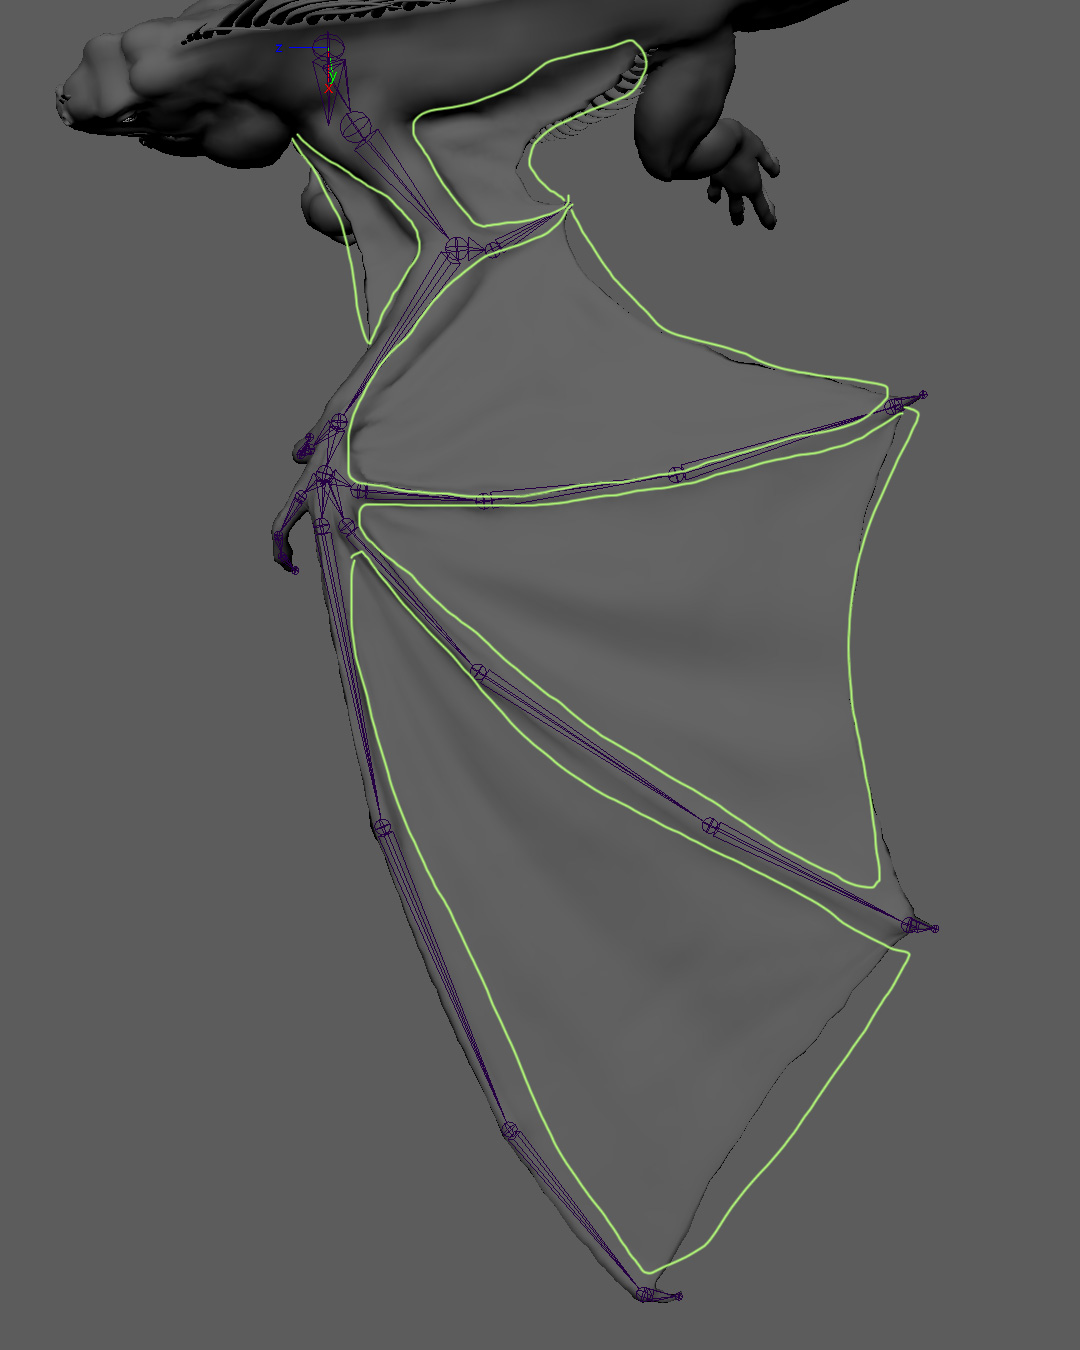
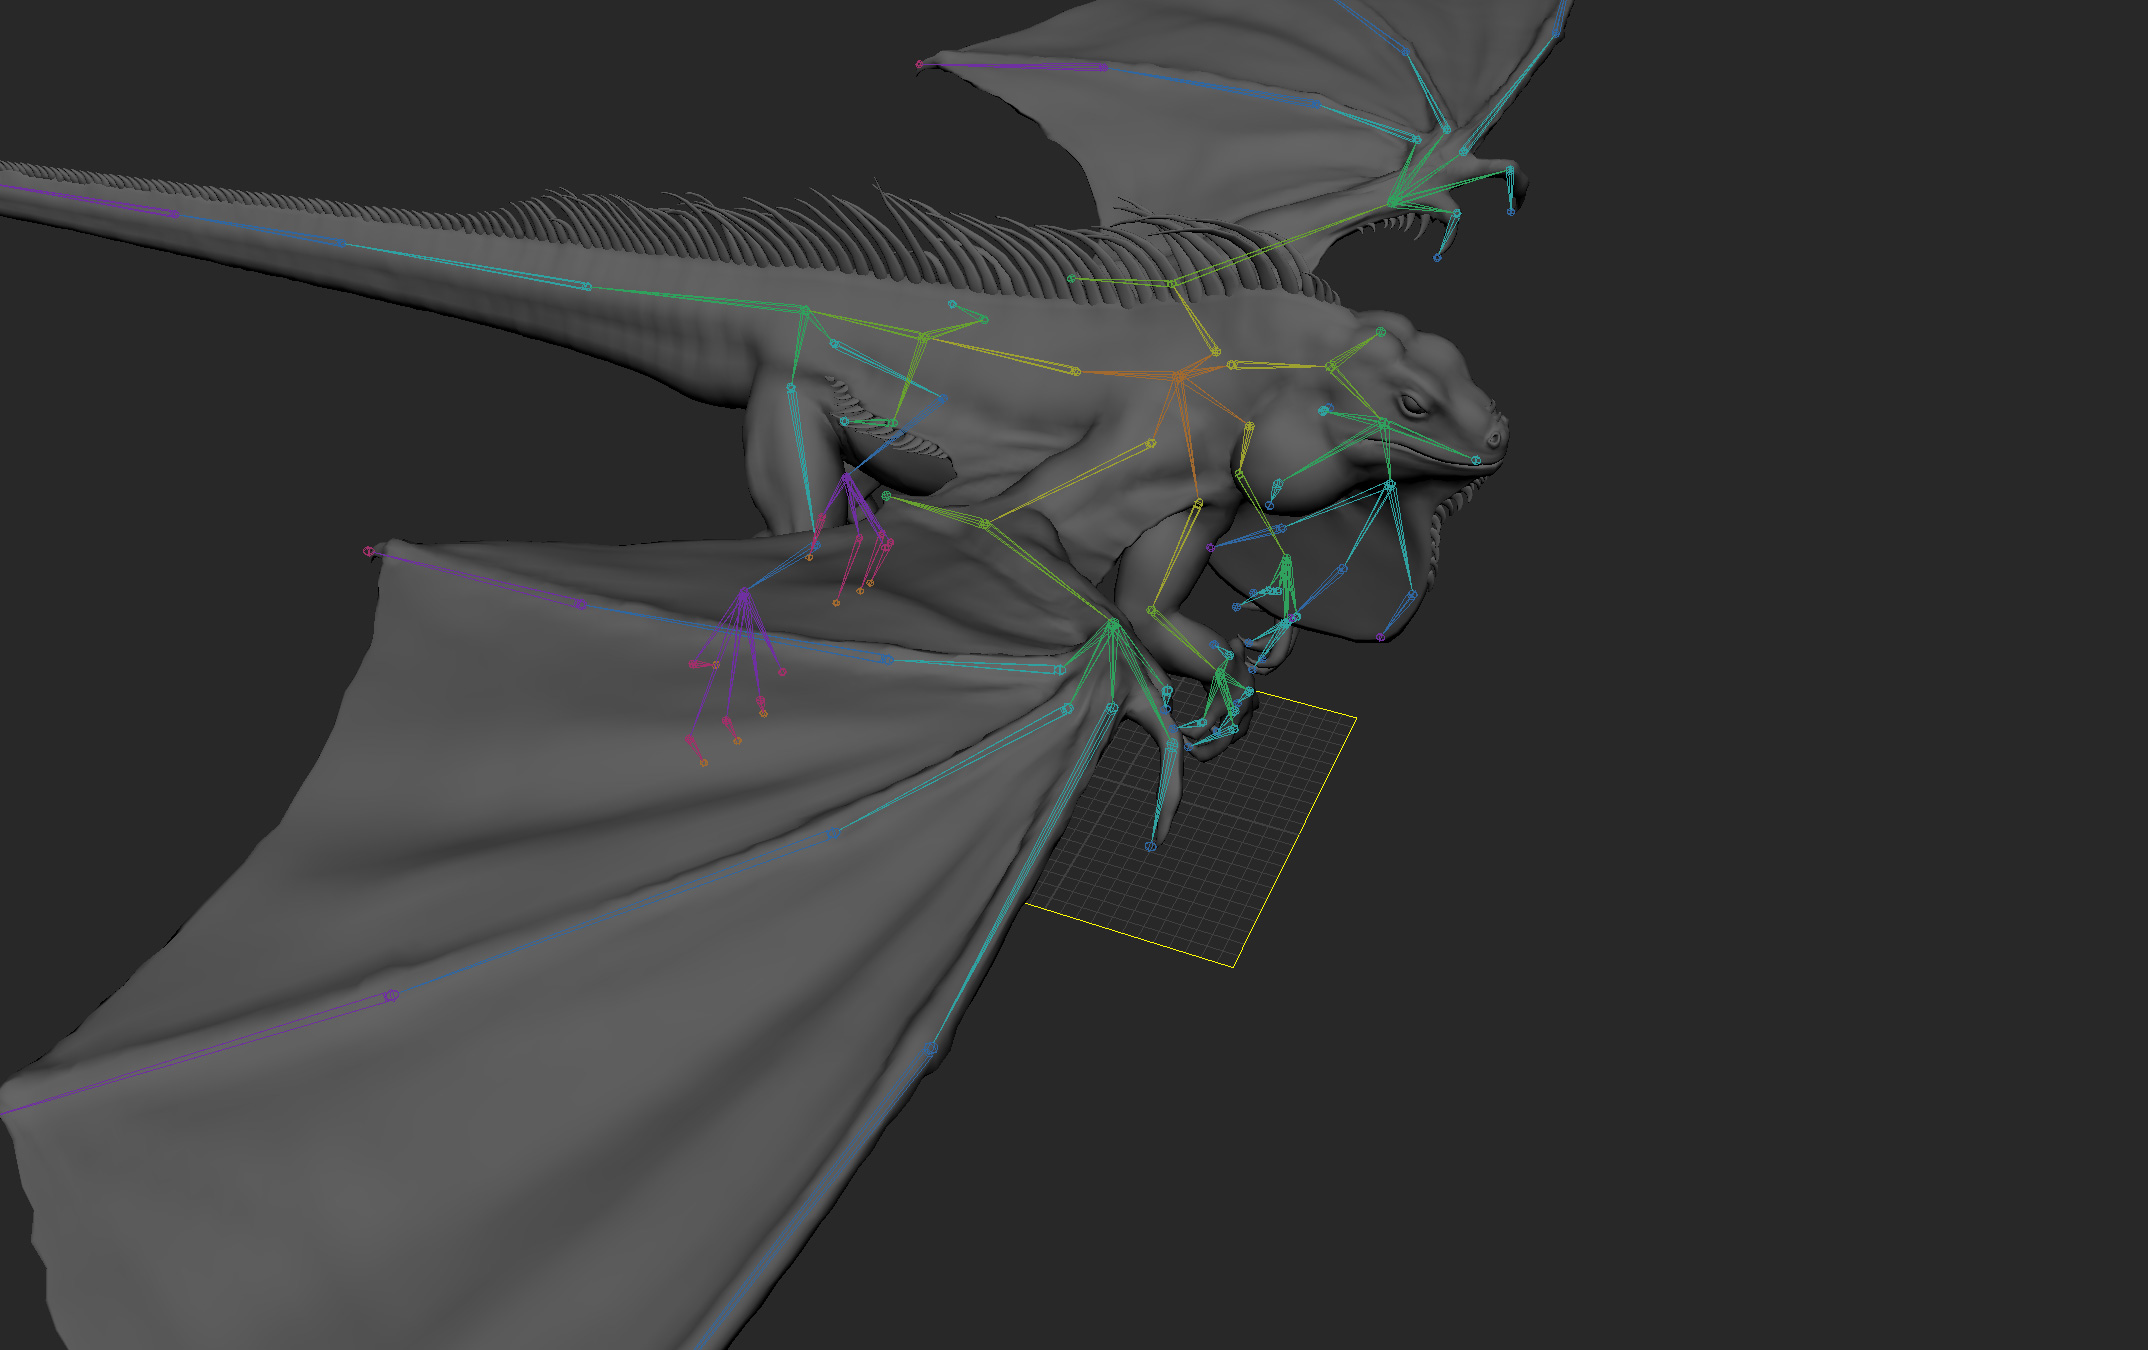
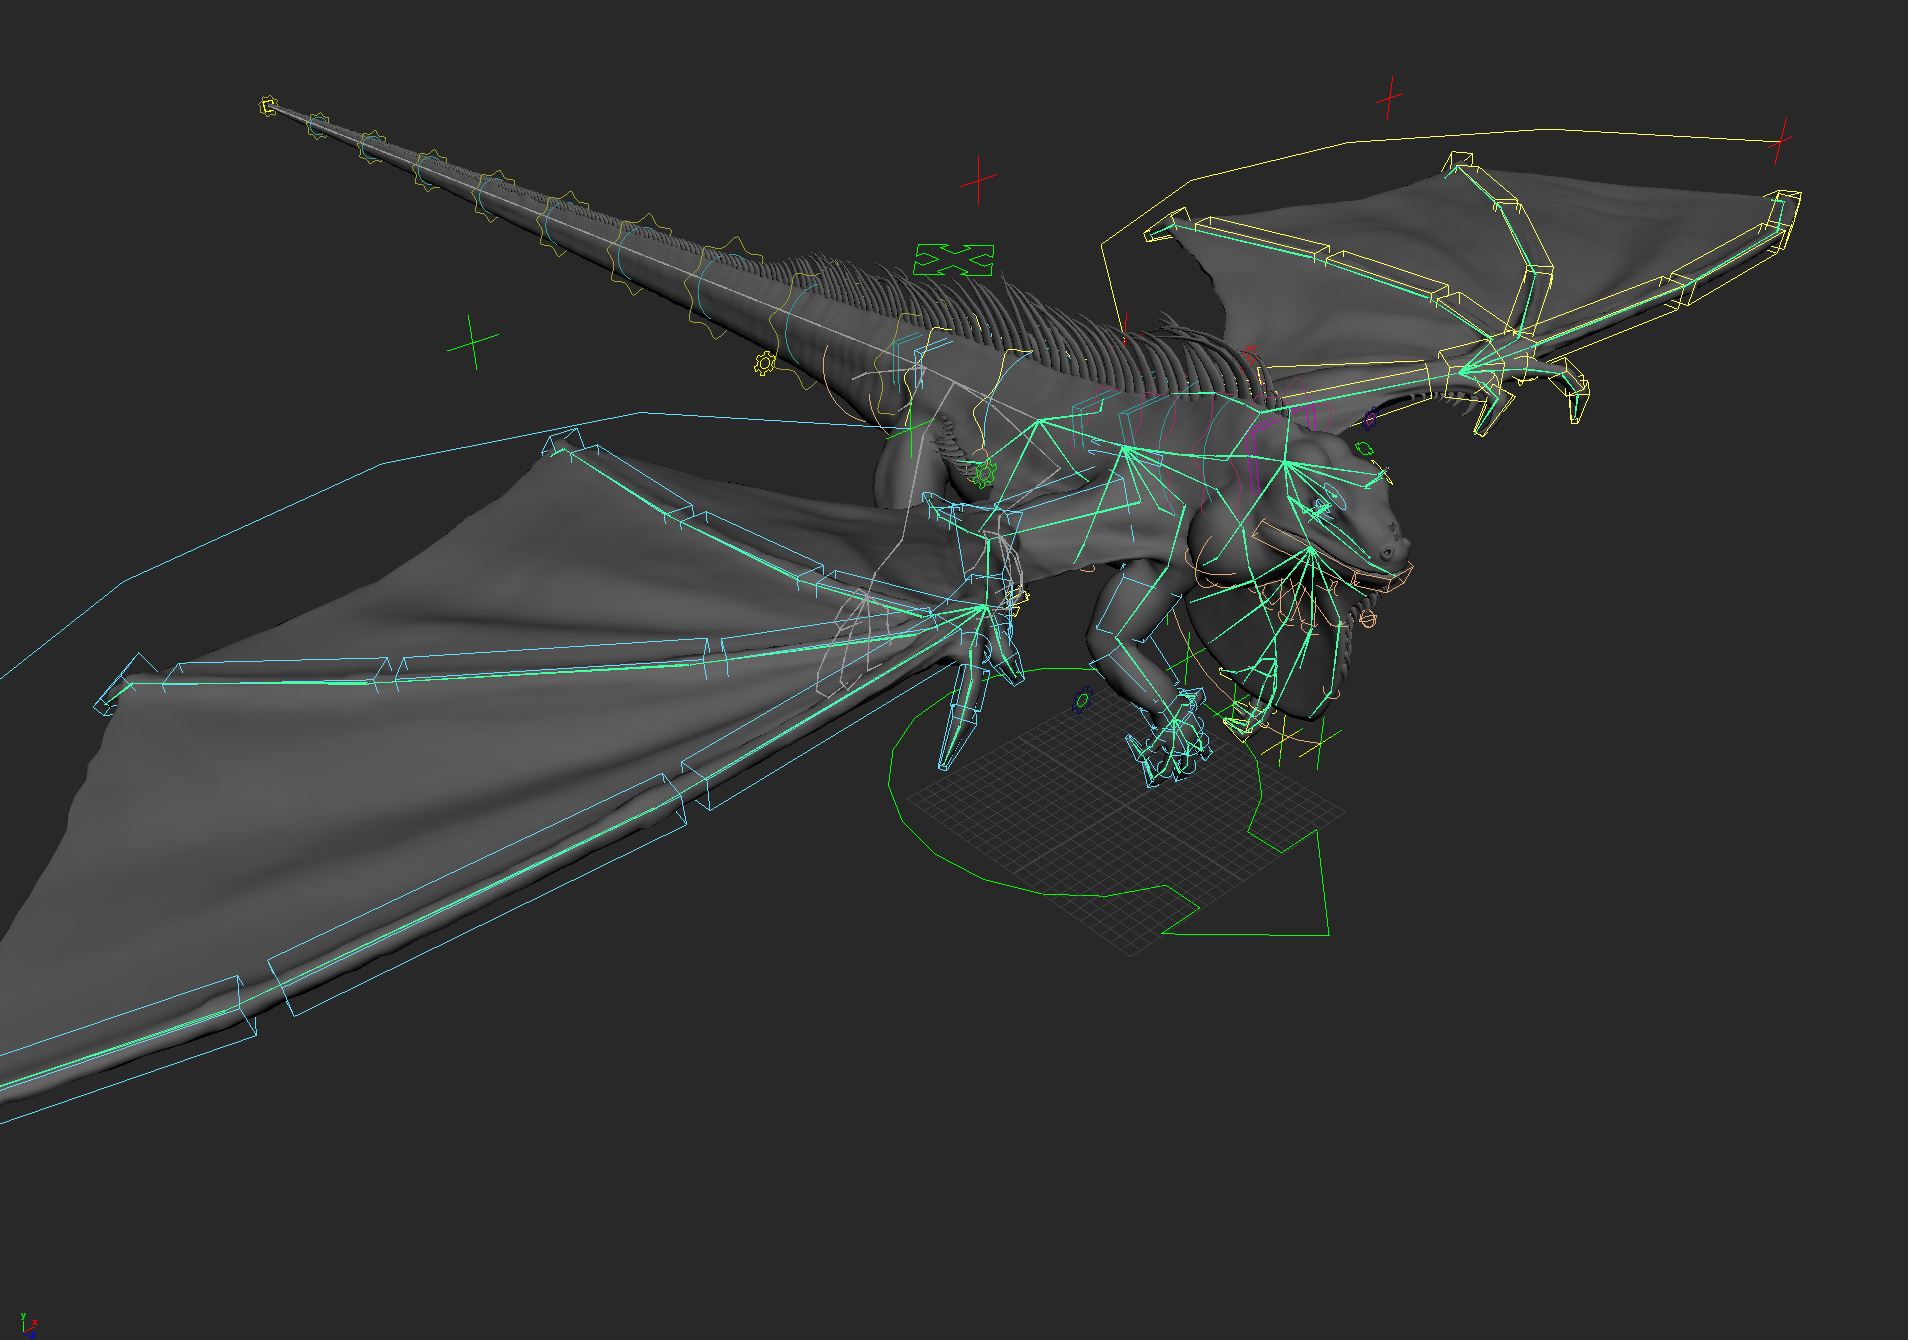
I would tackle one challenge at a time. Folding a wing is something even the most seasoned riggers struggle with. Try animating the shots of your short film that doesn’t rely on folding first, and revisit it once you have more experience.

This is totally doable, and I think now that you know more about how to rig just one limb you’ll realise the amount of work involved in rigging 10-20 toes; each of which requires similar treatment. Not to mention that simulating them also multiplies the amount of work required. Remember: each toe is as complex as a leg or an arm.

I would set your character up a few times without toes first, and approach toes once you’ve got some semblance of a workflow.

2 Likes

This response is insane. Marcus, really. I am in CG forum communities since 2005, since good old times with “red CGTalk”.
But this your response is the most unfolding and deep i EVER met. You really care about your community. Thank you for all your time, mate! Everything makes much more sense to me to say at least. Now I understand why in the beginning you said not to touch the fingers at first, haha))
Back to learning, back to work.

Oh, by the way, I yesterday spoke with Truong, the artist who did the rig for the dragon Jason used in showcase, somehow we follow each other on insta, i did not even knew this :slight_smile: He is open to help me where needed, which is great news!

Do you have insta?

Hey Marcus, I am trying to follow this tutorial you sent in the very beginning (on the 0.25x speed :rofl:).

I did very quick rig, as you showed there and skinned. Seems like it’s all good for this purposes.


But then I stuck on 1:34 of your video where you say “assign some markers”. I see you go to RagDoll tab, you click on Assign and Connect and then I am lost. Can’t follow what you are doing next.

I see that something appears inside the model but what next? How you continue to apply these shapes on the rest of your model?

Thank you!

The tutorial assumes you’ve already completed the ones before it, in this case I would suggest you take 10 minutes to walk through this tutorial here.

It’ll highlight the importance of your selection as you assign, along with how to tune the shapes once that’s done. This applies to everything you do with Ragdoll.

image

About this, this will be a challenge for you with such a high-resolution mesh and for those little fins sticking out of the tail. In these cases, I would recommend skinning a low-res proxy of your model instead of this render mesh. Something on the order of 3-6 edgeloops per tail joint; entirely excluding the fins. The less you can get away with the better.

From there, you can either:

  1. Transfer the skinning to a denser mesh (Copy Skin Weights)
  2. Directly wrap deform the high res mesh with the low res mesh (Wrap or Proximity Wrap)

In either case, you’ll have a much easier time skinning and get a lot of interpolation and smoothing for free. Since you use ZBrush, either fetch the lowest level of your model or a ZRemesher should suffice.

Not yet!

Hi Marcus, thank you for your explanations!
Sorry I disappeared. We have a delivery on a work project, it takes most of my time, and also I am working on learning rigging. Slowly but steady getting there. Once I’m done with both of those things - I am back to Ragdoll.

Question to you, even tho I’ll have fully rigged and skinned model I still will have to work on a lower-res version of it?

Thank you!

P.S. My progress…
https://www.instagram.com/p/Cwx3DHDvm66/?hl=en
https://www.instagram.com/p/Cw-NkEnAYI0/?hl=en


No problem @RID, good to have you back. I don’t have access to Instagram on this end, would it be possible to post images and/or videos like you’ve done above? That would surely help others who also may not have access.

If you don’t need it, you don’t need it. The benefits of a low-res version are:

  1. Run-time performance for the animator (yourself in this case)
  2. Setup-time for the rigger (also you!)

Run-time performance includes the FPS you get during playback, the FPS you get when manipulating the rig and the loading time of your scene. Setup time is time taken to skin, to tweak the skin, and the various hoops you’ll have to jump through to do anything more complex with your rig, such as attaching controls or muscles to other vertices (e.g. follicles).

If neither of these are an issue to you, you’re all set. Although I have yet to see anyone not benefiting from a low-res version, I expect it is only a matter of time for you to realise this yourself.

1 Like

Hi there @marcus

would it be possible to post images and/or videos like you’ve done above?

Sure, will do next time. will have to upload to google drive. Video is 15 sec but still over the forum weight limit.

Although I have yet to see anyone not benefiting from a low-res version, I expect it is only a matter of time for you to realise this yourself.

Yeah, agree. It always works like that. Everything have to be experienced on own skin to realize ))))

I have a question to you. I am currently doing this tutorial you recommended, and I am stuck on 6:56 where you unlock the geometry layer. I don’t have layers in my case and still unable to select any original model geometry.
I am attaching screenshot. As you see the selection options there are not locked as well. The only way I can select parts is through outliner

Thank you!

Hi again, Marcus!

I did some progress on this wasp tutorial

I have some questions if you have time.
This is how the rig looks like.


It’s much simpler than the main one I am currently working on.

This is what I got (for now) with a base shapes

Here I met first issue. I don’t know how to be with the shapes on the ends of the rig. Especially hands/fingers.
As an example I did the hierarchy connection to cheek joints, and for some reason they don’t connected to main shapes but kind of separated. And when I try playing animation they drop to the floor

Not sure for now how to be with such and similar parts of the rig. And mainly - how can I delete those “fallen” parts? When I try delete them - the whole system deletes.

Thank you!

Unclear, maybe a graphics issue or Maya bug? Good to hear selection via the Outliner works at least.

Head into the Manipulator, select the shape, and press the Delete key on your keyboard. When you select something in there, it will also select it in Maya. They will be visible in the Outliner if you uncheck “Show DAG Objects Only”.

image

Another option is to select the control you assigned, and run Ragdoll → System → Delete Physics from Selection.

A good start, but I spot a few red flags. Mainly, try and keep children lighter than their parent. The tail is a good example of where this is done right; each parent is larger - and thus heavier - than it’s child. But the head on the other hand looks much heavier than the neck. Likewise for the upper arms, they will be carrying the weight of that whole hierarchy and will need a lot of mass to do it.

When children are heavier than their parents, you end up with a wrecking-ball effect, where children lead the motion and pull too heavily on their parents.

Hi Marcus! Super excited to share with you some updates on my side :)))


1 Like