Highlight for this release is Complex Geometry!
- ADDED Environment Static polygonal geometry for collisions
- ADDED Automatic Mesh Islands Ain’t got no time to slice?
- ADDED Soft Joints More natural ragdolls with some softness inbetween limbs
- ADDED Forum 2.0 Same old forum. New and improved!
- ADDED Subscriptions Monthly licencing, now available
- ADDED Licence Conservation Lease only the licences you actively use
- ADDED Select with the Manipulator Selecting Markers got a bit easier
- ADDED Reset Shape Return to simpler days
- ADDED Group API The group mechanic was added to the public API
- FIXED Multiple Manipulators Two or more solvers no longer breaks the Manipulator
- FIXED Lease Licence in UI Now you can actually use that Lease button
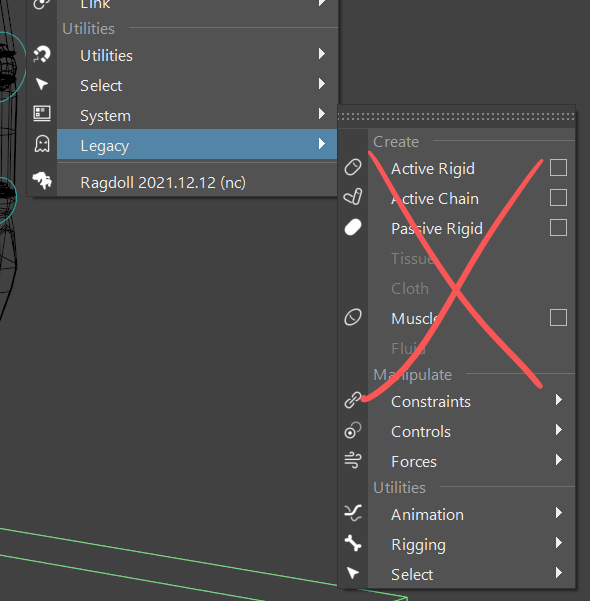
- REMOVED Legacy Legacy files still open and run, but can no longer be authored.
Showcase
Before we get into the new features of this release, let’s have a look back at some highlights of the week.
For the Love of Ragdoll
Animation by Kevin Taylor, model by Shaun Keenan.
https://user-images.githubusercontent.com/2152766/155683889-3a4c3080-4384-4fbb-bd5a-aabcb9c6cbb8.mp4
Dragon Setup Livestream
The dragon from the latest livestream last Friday!
https://user-images.githubusercontent.com/2152766/155685518-2a57284f-b796-456c-8612-02bc5d956f39.mp4
Chewsday
A little experiment with worldspace rotation stiffness.
https://user-images.githubusercontent.com/2152766/155703548-9abbd436-f6ac-4eb2-991f-06549f6d810a.mp4
Rhino Workout
Soft joints for some belly-jiggle.
Rhino Walk
Nice self-walking rhino.
https://user-images.githubusercontent.com/2152766/155685698-15163dc5-048e-4a11-9408-c931c1b69910.mp4
Self Walking Manikin
Same trick, different character. ![]()
Soft Joints
Jason experimenting with the new Soft Joints feature.
https://user-images.githubusercontent.com/2152766/155684055-62921db2-9bb5-49db-ac7b-4bd3f104fb92.mp4
Facial Animation
Getting some nice secondary motion out of moving the head and jaw around!
https://user-images.githubusercontent.com/2152766/155685431-d88d3152-4711-46f3-b77e-bcc27cbdcf75.mp4
Environment
Ragdoll now supports static environments; meaning environments that cannot move or deform, but allow for normal polygonal geometry without the need for a simplified “convex hull”.
As you might expect, this works well for environments like terrain and other complex geometry that is otherwise hard to turn into a rounded mesh.
https://user-images.githubusercontent.com/2152766/155138876-9544e306-c93f-4891-ad3d-070ed8a78826.mp4
Performance
It’s fast.
Normal shapes are limited in how complex they can get, and as such you never really run into a situation where the shape noticeably affects performance.
Triangle meshes are different; they can be of any complexity. Up to millions of polygons and beyond. So it falls upon you to decide where to make the performance/quality tradeoff!
| Vertex Count | Cooking Time | Run-time performance |
|---|---|---|
| 400 | 0.39 ms | 685 fps |
| 8’000 | 3.51 ms | 599 fps |
| 16’000 | 14.3 ms | 594 fps |
| 64’000 | 61.5 ms | 327 fps |
| 256’000 | 287.7 ms | 40 fps |
| 1’000’000 | 1490 ms | 2 fps |
What is cooking time?
The time it takes for Ragdoll to convert your polygonal geometry into the internal representation needed for collision detection. It involves splitting up the mesh into areas or “zones” for faster lookup.This only happens when the mesh actively changes and when first opening the Maya scene, and won’t affect playback speed.
https://user-images.githubusercontent.com/2152766/155157548-7d8c7fee-4dfd-4822-be56-5f18ae4dd584.mp4
Automatic Mesh Islands
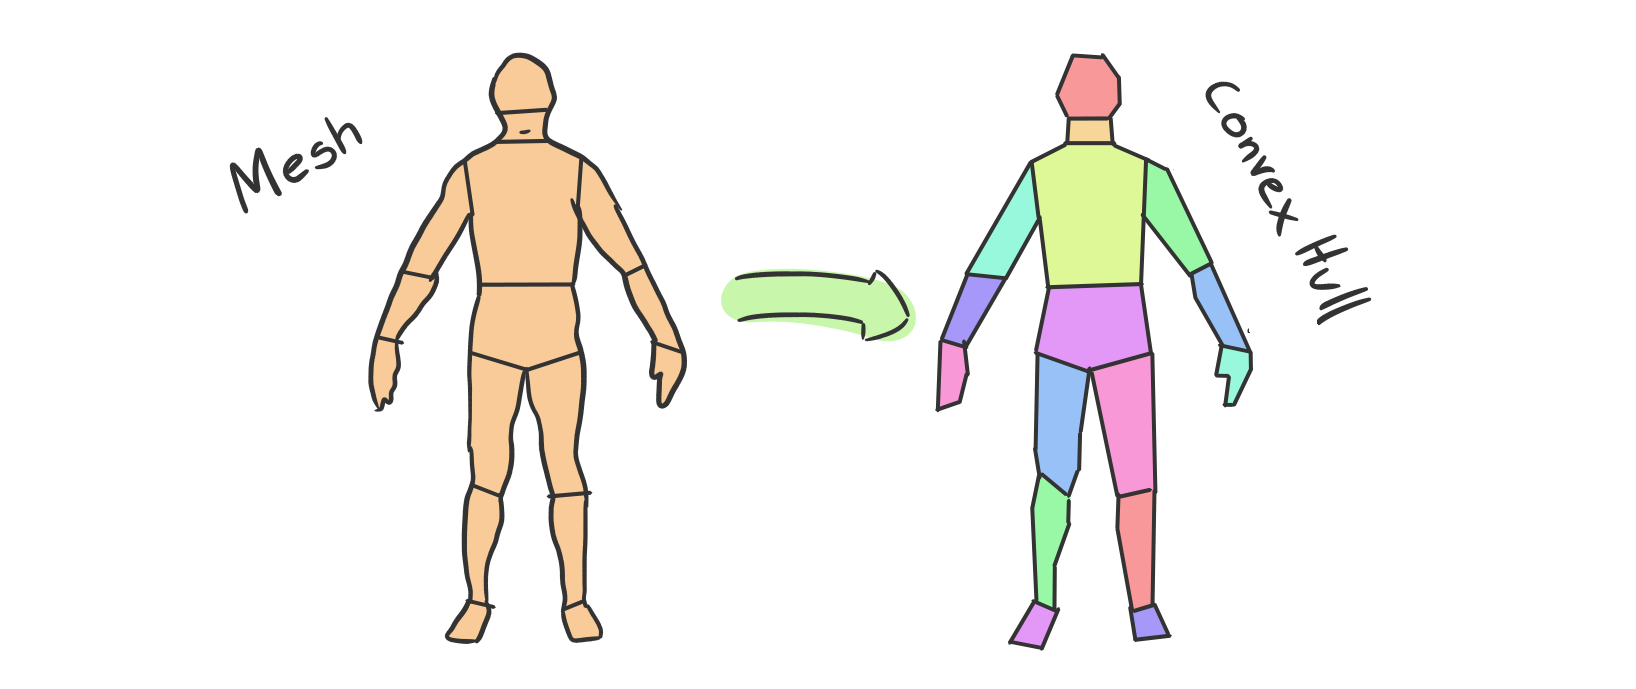
Ragdoll needs “convex” meshes for anything that moves.
What is a convex mesh?
Think of it like a shrink-wrapped version of your mesh.In 2D, it might look something like this.
Notice how the points in the middle are excluded? This is an optimal shape for collision detection, as you can draw a straight line from anywhere in the world and know that if it ever hits this shape, it hits it in only 1 spot.

In the previous release, “Mesh Islands” were introduced to turn each separate polygonal island into its own convex hull and glued together as one complex shape.
With that, you have a great deal of control over the final collision shape
https://user-images.githubusercontent.com/2152766/155695778-1f05ecd3-9168-4419-92e6-6a8f2ef2498d.mp4
Multi-cut settings
Tick theExtract Facesbox, and zero out those values to get Maya to perform an actual split in the geometry as you cut. Otherwise, it will only insert new edge-loops and not actually create two separate meshes.
It did, however, mean that you had to take the time to manually slice up the mesh, which may not always be feasible. This release introduces an automatic method of slicing up a given mesh, into a close approximation of the original mesh.

https://user-images.githubusercontent.com/2152766/155679467-d240000c-3bad-4421-9d7a-ff71303a4fa1.mp4
Attributes
There are a number of parameters to tune when generating your convex hulls, here’s what they mean.
| Attribute | Description |
|---|---|
Resolution |
The number of “voxels” to generate from a given volume; the greater the number the more accurate the resulting representation. At the expense of time. Values between 100-1000 are normally sufficient. |
Concavity |
The maximum allowed different in angle across the surface of the resulting meshes. It might be thought of as “roundness”. |
Symmetry Bias |
Slices are made either horizontally and vertically, or radially. This value controls how much to favour the former. |
Revolute Bias |
And this value controls how much to favour the latter |
Min Volume |
Ignore computed volumes that are smaller than this. It can help reduce the number of very tiny meshes. |
Max Convex Hulls |
How many separate meshes to make. This will depend on the complexity of your mesh, but generally the lower the better. |
Plane Downsampling |
Performance related, lower values take longer |
Hull Downsampling |
Also perforamnce related, lower values take longer |
Fill Mode |
Various ways to deal with geometry that isn’t a closed volume. A sphere for example is a closed volume, whereas a plane is not. |
Approximate Hull |
Performance related, faster when ticked. |
Project Hull Vertices |
See what the generated meshes look like before they are “shrink-wrapped” back onto your model. These give you a good sense of how large the voxel resolution is. |
Complexity
Over time, as we learn more about which parameters work best in the most general case, I’d like to reduce the number of attributes here. Ideally we would only have aQualityattribute withLow,MediumandHighsettings.
https://user-images.githubusercontent.com/2152766/155679458-8dd72fb4-a8a5-42c5-a349-aced21c2ccdd.mp4
Performance
It’s slow.
The process of automatically slicing your geometry is not real-time, it can take up to a few seconds or more. On the upside, it only ever happens when the mesh changes and does not affect playback performance.
Here are some timings for the meshes in the below simulation.
| Object | Pieces | Time |
|---|---|---|
rMarker_Barrels |
30 | 1.9 s |
rMarker_Ceratopsia |
16 | 0.7 s |
rMarker_FingerPlates |
64 | 6.1 s |
rMarker_LeaflessTree |
183 | 6.3 s |
rMarker_bull |
16 | 0.8 s |
rMarker_fish |
16 | 0.7 s |
rMarker_hand_basemesh |
16 | 0.3 s |
rMarker_horse |
16 | 0.9 s |
rMarker_humanBody |
32 | 2.9 s |
rMarker_jetFighter |
16 | 0.5 s |
rMarker_polySurface9 |
16 | 1.6 s |
rMarker_shirt |
16 | 0.9 s |
Faster performance is on the map
This method is new to us, and we expect to find faster - ideally real-time - alternatives to this in the future.
Soft Joints
To balance out the talk of complex but hard geometry, let’s talk about “soft joints”.
https://user-images.githubusercontent.com/2152766/155835309-06736087-6b44-4cb7-ac0c-58646d007dca.mp4
Once I set Translate Motion = Soft and the feet hits the ground, notice how:
- The spine is compressed
- The legs are compressed
- The arms are extended
Here’s a more extreme example.
https://user-images.githubusercontent.com/2152766/155835296-8d4d08a0-32f4-4234-a65a-cf5b56982790.mp4
https://user-images.githubusercontent.com/2152766/155835304-8ddf0b5d-4208-4940-8443-5ec3d68a2d35.mp4
https://user-images.githubusercontent.com/2152766/155835312-478f50a7-061d-46a9-8613-44915497b210.mp4
General Purpose
We’re calling it “soft joints” when in reality this is Pose Stiffness but for translation rather than rotation. Which means you could use it for tentacles and other appendages that depend on not just rotating limbs but squishy and compressed limbs. Potentially stretchy limbs and spines too?
We haven’t yet explored this fully, so take it for a spin and let us know what you come up with. ![]()
Caveat
When stiffness goes too low, limbs detach.
This is unintended behaviour and will be addressed in a future release. Proper breakable constraints are on the map, but this isn’t it. So use with caution, and limit it to create softness between your limbs.
Forum
The forum has gotten a face-lift! This will henceforth be where tutorials and showcases appear, along with notifications for new releases!
So sign up, subscribe to the News category to receive notifications when things happen in Ragdoll-land!
Subscriptions
Out of beta and available to all.
If you need a more low-cost but commercial introduction to Ragdoll in your studio, then this is for you.
Group API
You can now make groups via the API.
from maya import cmds
from ragdoll import api

solver = api.createSolver()
ground = api.createGround(solver)
group = api.createGroup(solver)
sphere, _ = cmds.polySphere()
cmds.move(0, 10, 0)
marker = api.assignMarker(sphere, group)

cmds.evalDeferred(cmds.play)
The assignMarker command has also been simplified and does not longer implicitly create a group.
Quality of Life
A few more things to make your day that much more bright.
Manipulator Selection
You can now use the Manipulator to select both the Marker and Maya node, such that attributes can be edited in the Channel Box.
Manipulator Fit-to-view
Using the manipulator via the Ragdoll menu enabled you to also benefit from the F key, to fit your selection to the current camera.
But if a Marker or Group was selected and editable in the Channel Box, that no longer worked. Because under the hood, what you were really fitting in view was the solver shape node.
This has now been fixed such that you can fit any selected Marker, regardless of whether the solver shape node is selected or not!
Select During Playback
The Manipulator can now be used to select Markers during playback.
!!! info “Caveat”
Selection is based on the current simulated state and doesn’t understand rewind. To fix this, step at least 1 frame forward whenever you attempt to select, to ensure the selection and simulation is staying in sync.
This will be addressed in a future release.
Reset Shape
Whenever you assign a Marker, a default shape is computed based on your selection and available geometry or NURBS curves.

Refit Assignment
Likewise, when you branched off into a tree-like structure for your markers, you could easily end up with something like this.
https://user-images.githubusercontent.com/2152766/155589792-71c0756b-a5a5-4721-b848-6456b5c2d274.mp4
This has now been addressed, whereby the marker which forms a fork now being reset automatically.
https://user-images.githubusercontent.com/2152766/155589785-3a6d5e56-151a-4603-9a74-80ebf34a563c.mp4
Licence Conservation
Applies to
This feature only applies to Floating Licence customers.
In the previous release, a licence was leased on plug-in load.
The problem was that, sometimes, an artist merely opens a scene with Ragdoll in it. Maya will determine that this file requires the Ragdoll plug-in to be loaded, and loads it. Upon load, Ragdoll would go ahead and check out a licence. But this artist doesn’t necessarily want to interact with Ragdoll, it could have been a texture artist opening up an animator’s scene, or someone rendering it.
This release introduces “licence conservation” which only tries to lease a licence upon a simulation taking place. That means a lease is not made on plug-in load, nor on scene open. If a solver is hidden from view, nor does it take place on playback start.
Only once simulation visibly begins is a lease requested, helping you save those precious seats for the artists that need it most.
Markers are still rendered in the viewport on the start frame for everyone, without a lease. The Solver is automatically hidden upon failure to lease a licence, pausing any further requests until it is made visible again.
Minor Releases
Inbetween this release and the previous release there were a few minor releases made.
- Fix crash on fit-to-view
- Fix crash on replaced mesh with 0 vertices
- Hide prototype world and local attributes on the
rdGroupnode - The
Request Leasebutton in the Ragdoll UI now actually works
Legacy
The menu items for the old Legacy interface to Ragdoll Dynamics has now been removed. Scenes created with this interface will still open, so this is your last chance to save your work and transition to the current Marker-based workflow.


