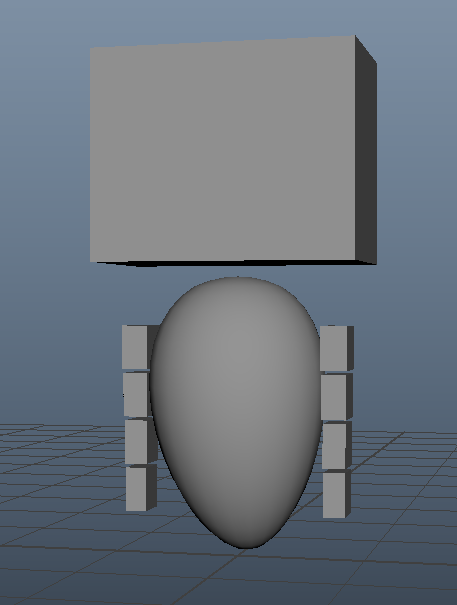
I have a very simple robot design with just a body, a head and two subtly bendy arms but am unable to get the motion from it that I’d like. I’ve mocked up the body shape for testing like this:
The mockup model is also attached as .ma in the attached robot mockup zip.
What I’d like is to simply animate the body, head and arms to give some overlapping floating motion to the body and head as he flies around - and additionally have him float up/down as if influenced by a turbulence field but I keep getting very springy motions where it tries to force it really hard to the animated position. I’m unable to find out how to get a nice floating effect or motion from Ragdoll with this character without pushing damping really high and give it an underwater feeling.
I’ve tried making all parts of the character dynamic and ‘animating’ him around using the Pin Constraint and also have tried to add a more global like ‘sphere’ as a ragdoll parent shape for body, head and arms to act as the kinematic part that I animate. But no luck either way.
Whereby you can control the springiness via the global Air Density attribute, along with the Damping values on each individual Marker or their common Group for more control.
Now, your scene in particular is problematic. I would strongly advise against assigning to meshes directly, because it’s not clear where their pivots are. Joints on the other hand have a very clear pivot, as it’s rendered directly into the viewport.
In this case, these meshes are all at the origin, with their vertices moved above it. They’ve likely been “frozen”. Which is mostly fine, except when pivots are important, such as for the Pin Constraint.
The best solution is to not assign to meshes; either use rig controls with proper pivots or joints if you are unsure. But I’ll show you how you can overcome this in case you cannot use either of those options.
Setup
For starters, Ragdoll will struggle to figure out how to align the default capsules when it can’t trust pivots. Turning everything to a Mesh shape solves this.
Pin Constraint
But notice here how the Pin Constraint and the shape are offset.
Here’s the kind of wonky result you can expect. Where it’s trying to rotate it the head around the origin.
Custom Pivot
One way to solve this is to:
Make a new node, like a locator or joint. Any Maya transform.
Put it where you’d like the rotation pivot to be, such as where the Maya Rotate Pivot is for the head
Parent it to the Maya head, such that it follows
Reassign your Marker to this new transform
Now the Marker will have a proper pivot, and your Pin Constraint will too. The only remainder is to address the mesh, which was relative this bad pivot. So we can use Replace Mesh back onto the same Marker, to generate a new (fixed) offset for that same mesh.
Thanks - my initial tests were done using controls that weren’t frozen towards the origin. I had just set up this ‘mockup model’ to share and discuss here on the forum.
Here’s a new version with a mini-rig that shows the issue I’m facing - here I’ve also tweaked the things to get as close as possible to the sim/motion I’d like but it remains feeling like the character is attached to a spring wobbling back/forth (which makes sense, because in essence that’s the sim) but I had hoped to find a technique that would be more believable. With this setup I’m also unable to get a believable effect of adding turbulence to the character’s motion since it’ll just keep pulling towards the animation with a spring as it is.
More believable, hmmmm. I’m not sure I understand what you mean. For this to be believable, we first need to establish how this would move if it was a real robot. At the moment, it’s got an invisible force pushing it from the center of its body. That is already not possible, and would produce unrealistic behaviour from the get-go.
An alternative would be to have it fly due to rockets on its back or underneath its body. In that case, you can either have a control there or use the locator-trick above to set the pivot to there, and only use Translate Stiffness to steer it. You’ll find that it’ll become rather challenging to keep it upright, like it would in the real world. You’d need to compensate for its center of gravity as you move the Pin Constraint around. But if you do, you’d get a 100% realistic (and hopefully “believable” which is not always the same) result.
The Turbulence Field will push each Marker in the scene. Just like the Pin Constraint will push the body in the direction of the constraint. But instead it’ll be randomised for a Turbulence Field.
The final effect will be the combination of these two things; so if you aren’t seeing a strong enough Turbulence, you can increase its magnitude, or decrease the Pin Constraint Stiffness values.
If you’ve got a reference of the motion you’re looking for, I think it’ll make it easier to know how to tune your settings to achieve it because at the moment I’m not sure I’m getting it right!
The best reference I can think of might be Eve from Wall-E, e.g. the subtle floatiness around here, here or here or lastly this one. But maybe looking at these references now the motion is much more damped than I recall.
Another solid reference from Wall-E but not from the super stable “Eve” character might be the floating devices seen in this sequence e.g. all the hovering babies.
I just had the idea that maybe the motion I’d be looking for was as if the controls I’d animated would be the ‘forces’ applied to the character and not the exact position it’d need to act to. Almost as if per frame/step the velocity of the animation between the frames get applied to the simulation instead of springy like motion continuously pulling it to the animation position. Then it’d feel more as if the animation implemented would’ve been the forces driving the character and the result would be more of the ‘easing’ and drag effect I’d expect for a floating character.
There’s probably tons of bad things by doing that - like the character deviating more and more over time. But just wanted to drop the idea here as a brainfart.
Not only is it damped, but it is also completely unrealistic. As much as I like Pixar, physical realism is not their strong suite.
It’s too subtle of a question, all of the ingredients are there but the rest is subjective.
You can control the position of the simulation (pin constraint)
You can control the amount of force to use to reach that position (stiffness)
You can control how much overshoot should be allowed (damping)
You can control the pivot at which that force is applied
With these ingredients, there is no motion that cannot be achieved. The rest is up to taste.
This is what happens. The distance between your Pin Constraint and the Marker determines how strong of a force to apply. As that distance decreases, the force is lowered until the position is reached. You can think of Damping as the amount of overshoot you want; a lot of overshoot can look more like a spring, whereas very little overshoot makes it look like clay.
I understand - what I meant was that instead of having a constraint that PINS it like that (so unlike a spring) that it’s a force that if object X moves towards the right by ten units that only that moment/instant it’s pulled that direction and losing force over time. When the object would be static (even when not at the position of the rig) it would not apply any more forced or attracting.
In essence it’d just be like a force field which would mimic the positional and angular velocity of the control transferring that momentum to the object.
I think I was just looking for a way to apply some extra momentum to the character like that without requiring it be exactly pulled back to where it was animated as to avoid the full “pinning” / “spring” effect. I just wanted to have some secondary floatiness - similar to how a fully dynamic ragdoll with gravity 0 and an animated turbulence field kind of moves about.
Maybe you could animate either a Pin or a Uniform Field, or connect the Translate X channel of something you’ve animated to move to the right by ten units, into the Magnitude of that field or Translate Stiffness of the Pin Constraint.
Hi Marcus, I am new in this ragdolldynamics, I am curious, this is a .ma animation? Meaning you can use this animation like baked and then use it for anything? Like comercials, video games, etc?