Creating Springs and Blending Between Animation

Hello! I have a few questions that, while may seem unrelated out of context, are big questions for my team. I’ll organize them here:

  1. What is the best way to create a Spring using Ragdoll?
    I’ve rigged up a stretchy spring using a ribbon, capable of compressing really small or stretching out very far. With Ragdoll applied to the joints on the ribbon, we’ve gotten results where, when stretched, the markers are very far apart and don’t follow the animation controls closely at all, even though the ribbon joints do. We’ve tried ramping up the rotation and translation stiffness to 1000 to try to get the markers to more closely follow the controls, with little luck. The ragdoll setup we have is very basic at this point: no constraints or fields, just markers applied to joints with mesh replaced to better fit the model. Is there a better/ideal way of setting up a stretchy spring, or stretchy arm, that will more closely follow the animation while providing springy-ness?

  2. Is there a built-in way of dialing the physics to be half on, half off, rather than polar values?
    Here again my team is trying to make the markers follow the controls more closely, in a keyable way. Rather than either having the markers be Animated or Simulated, we’re wondering if there’s a way we could tone down the physics to be, say, 50% Simulated, or 70%, at any given time for any duration. I know we could key the Stiffness of the markers, but that doesn’t seem to always make the markers follow the animation more (like in the Spring above). I’ve been thinking of placing pins on each marker, parented under their respective controls, with their stiffness linked to a custom attribute that my animators can key to achieve a similar effect, but if there’s a better way of doing this, that’d be amazing.

  3. Can Groups be used as Multipliers?
    Playing around with the groups, it seems that a marker can be set to either listen to the group, or use it’s own attributes. My team would love to instead use the group as a multiplier, so if an individual marker is set to Stiffness 3, and another Stiffness .5, the animator can increase both at once by setting the group stiffness to, say, 3 (making the first marker 9 and the second 1.5). Is that possible? Or is there another way of doing this, not using the Groups? I’ve been setting custom attributes using MultiplyDivide nodes, so would love if there’s an easier way.

Thank you for answering these seemingly random questions, I hope it all makes sense!!
Hi @Hallie, welcome to the forums and thanks for these great questions! :partying_face:

Overall, if you can demonstrate what you are seeing, it would help narrow down where you are and where to take things. But I’ll try and assume a few things and give answers to what I understand.

Since Ragdoll does not handle deformations, there is a limit to how stretchy things can get. But generally, it sounds like you’ve got the right idea.

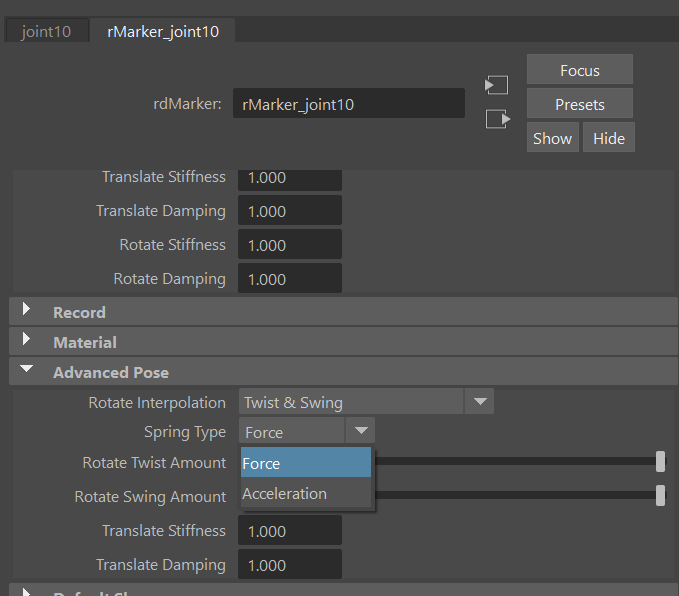
For very squashy situations like this, I’ve found better results with a Spring Type = Force rather than the default Acceleration.

spring1.ma (98.4 KB)

That said, if what you want is actual springs, then you can also model them as such and won’t have to deal with Translate Stiffness; which is really a way to fake spring behaviour.

spring2.ma (166.4 KB)

An example would surely help here, since this is generally the way you would achieve this effect. The strength of the effect is generally governed by the hierarchy depth and shape sizes; less depth and larger sizes tend to follow better.

That said, there are two “non-physical” ways to achieve the effect.

  1. Dial down the Weight of the resulting animation layer
  2. Tune the Blend attribute on the solver.

These achieve the same effect, either after recording the physics, or before.

They already are!

The values of a Marker part of a group are multiplied together for a final result.

  • Marker Rotation Stiffness = 10
  • Group Rotation Stiffness = 0.1
  • Final Marker Rotation Stiffness = 1.0

Some values are either/or, like Behaviour and Translate Motion. But stiffness are all multipliers.

Hope it helps, and again visual examples - even contrived small scenes - would help me help you more.

1 Like

Thanks for the advice Marcus!! It’s great to see that the Groups are already Multipliers, and there’s a Blend attribute we can use!!! Super helpful; however, in testing out the blend attribute we were getting some odd results when it was set to anything between 0 and 1:


^^ In the examples above, I set the blend attribute to decimals between 0 and 1, and scroll slowly through; the markers don’t appear to be blending smoothly between full physics and no physics, at least not in the way I’d expect. In this example, the square marker at the end of the ribbon is set to Animated the entire time. I expected the marker to stay put, but it seems to flow away from the control it’s assigned to as I blend. Other than that marker and the marker at the other end of the ribbon (which is also set to Animated), the rest of the markers are Simulating, with the middle three markers also having Soft Translation Motion. All the markers are set to spring type Force, as you suggested for stretchy rigs. Do you have any idea why the blend may be behaving this way, and advice to remedy it?

I also wanted to provide an example of the problem described above, where setting the Rotation and Translate Stiffness and Damping of the markers doesn’t seem to bring the markers closer to matching the animation:

In this example I show the markers’ behavior when set at 1 for both stiffness and damping, and then 100. While there is a difference in the behavior, the markers don’t match closer to the ribbon, control or joint locations. Any help with this would be extremely appreciated :pray:

Thanks again for your help Marcus, and sorry I can’t provide maya files. I hope these videos will be sufficient!

Hi @Hallie, thanks for asking this on the forums where it can help the community. :partying_face:

I’ve replicated the problem here and it seems you’ve found a bug!

We’ll investigate a solution to this, but for the time being you can resort to blending via the Animation Layer instead which is what this Blend attribute should be doing when working properly.